Monday, September 30, 2013

Spider Fun

I love Halloween and all the decorations and costumes that go with it :) Today's post is all about spiders. We are going to make 2 spiders today and both are super easy and inexpensive.


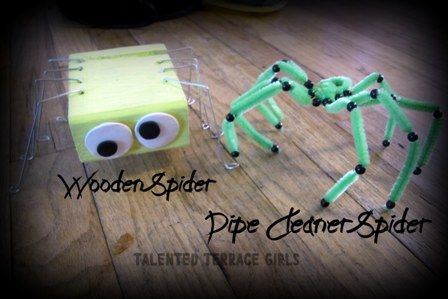
Lets start with our wooden spider
you will need-
a short length of 2x4
wire (guage16 or smaller, you can use a wire coat hanger)
wire cutters
hot glue gun
drill
and small circles for eyes (I made mine out of sculpty)
paint

Here are your measurements. I will explain it simple now.....take a 2x4 board and cut it about 2 1/2-3 inches long. Yep it is that easy. :)

Sand and paint your block/blocks. I painted mine neon yellow.
then drill 4 small holes on the side of your spider. The ends that have been cut.
Now attach your eyes there are many options. Googley eyes, a wooden circle painted to look like eyes or make your eyes out of sculpty (I did sculpty so I didn't have to paint)
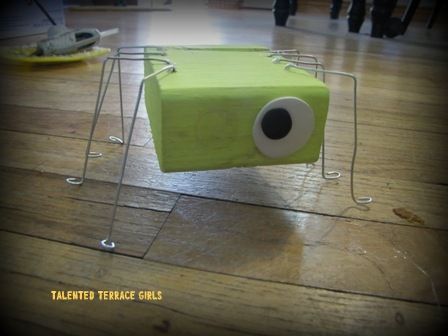
I hot glued my eyes on
now lets focus on those legs.
Cut your wire about 5-6 inches and make 8 lengths.
This part is the tricky part. You need to have 3 bends for each leg and the twist for the feet
lets start at the feet-make a small twist and then bend the wire up so your twist can sit flat on the surface. Once you bend your leg up let that length (the main height) be about 2-3 inches long then bend to over about 1 inch and then you should have a smidge left to bend down into your drilled hole.
that sounds confusing so lets just say you want a little to stick into the hole and then you want the rest of the leg to bent how it looks in the picture :)
Glue each leg into place so it doesn't fall.
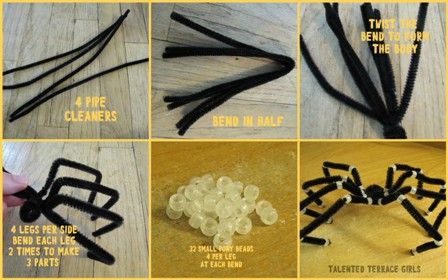

Pipe Cleaner Spider
There are your instructions :) simple and fun

I love hanging the spiders off frames and my wall clock. Every time I check the time on the clock it makes me smile :)


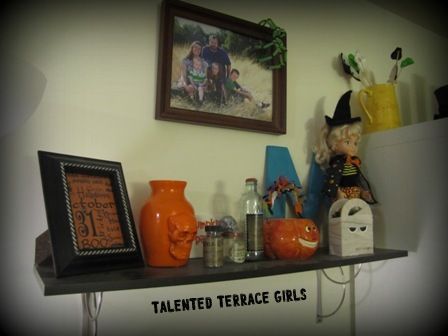
Here is my fun holiday shelf. This is the main place I decorate every season. I had told some of the other girls about my shelf and they wanted to see it.

Friday, September 27, 2013

Halloween Luminaries


I am excited to put these out for Halloween. 


Here is what you will need:
-modge podge
-Acrylic paint (I used orange, green, and purple)
-black vinyl
-Halloween vinyl designs.  (I used my silhouette cameo to make some.)
-clear glass jars.  (I got mine at the dollar store. Make sure you can some what fit your hand in to paint it and put in tea lights)
-tea candles or battery ones(I got mine at the dollar store
-paint brush


1. Mix each paint color with modge podge
2. Paint each jar on the inside using the paint/modge podge mixture
3. When dry put the vinyl designs on the out side. 
4. Stick a tea light inside the jar.  Light it or turn on the switch.
5. enjoy!

Thursday, September 26, 2013

Monster Wreath


This was such a fun wreath to make. It was super easy too! Basically if you can tie a knot you can do this.
Here were my supplies...,.I used a coupon on the tulle and the ring and got the eyes at the dollar store so it cost less than $10....much better than the $30 people were charging on etsy.....

First, cut your tulle into strips.  they neex to be about 12 inches long.  Long enough to tie in a knot around the ring and have some sticking out.  

Next, tie them in knots all around the ring.  You have to push them together every once in awhile so you can get them packed in tight.

If you are working with tulle that has glitter.....beware....it ends up everywhere....I made the mistake of doing this while sitting on the couch watching a show....I had glitter allover me, all over the baby, a trail of it through the house.....

Here was it with everything tied.  It's kinda fluffy =)

I glued the eyes on with hot glue and then cut the mouth out of white felt (foam actually works better but I didn't have any on hand and was impatient).  I realized that I did it crooked so I had to add another eye.  And he was looking a little shaggy so I had to trim some of my tulle.

I have been wanting a fun Halloween wreath and now I have one!!  and I also have an idea of dong some tulle wreaths for Thanksgiving and Christmas so stay tuned for those!!!

Wednesday, September 25, 2013

Halloween Wreath


I don't know why but I really enjoy making decorations for my front door.  I decided to make a cute Halloween wreath.  I went to pinterest for inspiration.

All you need is:
-wreath (I used straw wreath, a foam one would work to)
-Halloween colored tull (I used purple and green)
-ribbon for bow
-Spiders, skulls, ghost or whatever other thing you want to glue on the wreath

I started by wraping the tull around the wreath.  Then I made a bow for the wreath,  Last I glued on the bow and spiders.  Side note I painted spots on the spiders. 


I love how my wreath turned out.  My husband liked it to.  We think its looks spooky. 

Scrappin' Addiction: Joyful Expressions Sale!!

Have you stopped by the Joyful Expressions' store lately? It is packed full of sales. Here's a look at this week's sales:


Both Trinity and Teresa snagged their sets of the Dinosaur Dig.  Here in Ogden, we have the Dinosaur Park.  It is tons of fun for the kiddos.  This was the perfect kit for us to use to scrapbook the fun times we have there!!!


Teresa


Tuesday, September 24, 2013

Sweet Tooth Tuesday: Caramel and Chocolate Dipped Apples


I must be in the mood for Fall already.  I am wanting to wear my cozy sweats and pajama's.  I want to curl up with a blanket and watch a movie or read a book.  I also want to make some great fall recipes for dinner.  Too bad the heat hasn't broken yet.  The best I could do for now was make dipped apples.  I found my recipe here.

Here is what you will need:
1 cup melted butter
1 cup light Karo syrup
2 cups packed brown sugar
1 14oz can of sweet condenced milk
1 tsp. Vanilla

9-12 apples (I used granny smith0
candy or popsicle sticks.  (I used kabob scewers)
melting chocolate.  (I used milk chocolate chips and it didn't harden without the fridge.  I would suggest the wilton melting chocoate.  You can get it at Michaels)
optional: spinkles, nuts or candies

1. Wash and dry the apples.  Be sure to remove the stick
2. Remove stem and put in the stick
3. Combine the melted butter, Karo syrup, brown sugar, and sweet condenced milk into a heavy sauce pan.  Bring it to a boil on medium high.
4. Once boiling bring to medium to medium low.  Stir Constantly
5.  Let the temperature reach 233 degrees or soft ball stage
5. Remove from heat and stir in vanilla
6.  Dip each apple in caramel and place on greesed peice of tin foil.  I placed my greesed tin foil on a baking sheet. 
7. Let cool completely. 
8. Melt your chocolate and dip apples in chocolate
9. Let cool a minute and sprinkle on nuts, sprinkles, or candies.


Monday, September 23, 2013

Halloween Roundup 2013

28 Halloween Ideas!!!
With this Halloween Roundup we wanted to highlight our previous years posts so you could be reminded of our fun crafts and ideas! This post will kick off a week of Halloween themed posts to get you ready for the upcoming holiday! 
This is Teresa and I know I have already been in 2 different costumes this week!! With National Talk Like a Pirate day and spirit week at the school I work at I got to get dressed and have some fun.
Title and pictures are both linked :) 


Not all of these wreath's have tutorials okay only 1 does cause they were the winner (click on winner to see who won and get their tutorial), but you will be able to look and get ideas (a few girls gave mini instructions for how they made them)


This is one of our most popular posts. All us girls even loved this idea so much that after Emily posted this we all got together and made our own sets. 


Fablifyit Pumpkin Patch


Yes Whitney posted this as a reward party for her son being potty trained but really you can use it for any Pirate Party. 

Do you want to have a in home party and earn free things? If you have it near Halloween why not get all dressed up and party while you shop?