Hello all you crafters! My name is Keri from the Talented Terrace Girls blog and I am SO excited to be a guest blogger for such a fabulous crafting store. I am seriously in love with this place and appreciate that not only do they carry adorable crafts but all the supplies needed to complete the project! Yay for effectiveness!
When I was given this amazing opportunity to complete a Halloween craft I was giddy with excitement. Not only is Halloween a super fun holiday, but it is also my daughter's birthday! So needless to say we have a TON of Halloween decorations- and several of them were purchased at Wood Creations!
For this project you will need:
bat wooden dowel set from Wood Creations
mod podge
wood glue
black and white craft paint
glitter
three different sheets of paper
sponge brushes
sand paper
pencil
tulle or other embellishments for the dowel
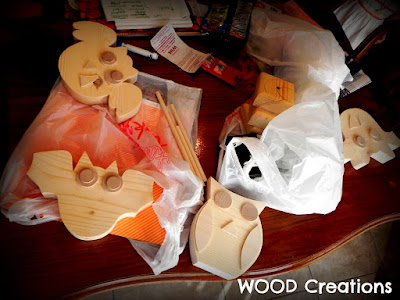
The first thing I do when starting a project is lay out all my pieces and put them in little organized piles. That way I know all the pieces are there and I can keep them from getting lost. You can see that there is a cute wooden owl craft in this pic- my daughter picked this out to make. I love bonding over crafting!!
Lightly sand all the edges of your pieces.
Lay the bat front side down on the back of the paper you chose. Now it is time to trace! (And what a great educational activity for your preschoolers, too!)
Hint: Use a white colored pencil to trace when using dark paper- it will show up a lot better!
I always like to label the fronts of my pieces- that way I can easily tell which side doesn't need to be completely painted. And I know which side will be getting mod podged and papered!
Paint your pieces! Remember that you don't need to completely paint the front side of your bats- just get around the edges in case your paper doesn't quite match up.
Most everything on the bats will be black except the teeth and the scleras (the white part of the eye). I just thought I would throw in a little human anatomy fact during the craft. I am teacher crazy like that. :)

I added a little glitter to the teeth by sprinkling it on while the paint was still wet. I am not sure if this is the professional way of doing it but it worked for me. Wood Creations has a wide assortment of glitter!
The worst part of painting.
Now it's time for the tricky part. Add mod podge all over to the front side of the bats before placing your paper on them. Then use mod podge on top of the paper to secure it down.
I must admit that I have a love/hate relationship with mod podge. One day I will be able to do it bubble free!! I have heard you can smooth the bumps out with a credit card. I need to remember that tip for next time!
Start gluing the pieces together!
Hint: You only need a small amount of glue- wood glue spreads and it doesn't dry clear. (At least the one we have). In the past I had to repaint over glue that had stained my craft a beautiful brown color.
Once the glue is dry I added some sparkly orange glitter tulle. I LOVE how the glitter sprinkled onto the base of the bat. So festive!

Then sit back and admire your craft! Aren't these bats ADORABLE?!
The bats now sit on top of the bookcase in our living room and are the first thing people see when they walk into our house!
I want to thank the Wood Creation for this opportunity to share our creation journey with you guys!
Happy Crafting!


0 comments:
Post a Comment