Showing posts with label Wreath. Show all posts

Thursday, September 26, 2013

Monster Wreath


This was such a fun wreath to make. It was super easy too! Basically if you can tie a knot you can do this.
Here were my supplies...,.I used a coupon on the tulle and the ring and got the eyes at the dollar store so it cost less than $10....much better than the $30 people were charging on etsy.....

First, cut your tulle into strips.  they neex to be about 12 inches long.  Long enough to tie in a knot around the ring and have some sticking out.  

Next, tie them in knots all around the ring.  You have to push them together every once in awhile so you can get them packed in tight.

If you are working with tulle that has glitter.....beware....it ends up everywhere....I made the mistake of doing this while sitting on the couch watching a show....I had glitter allover me, all over the baby, a trail of it through the house.....

Here was it with everything tied.  It's kinda fluffy =)

I glued the eyes on with hot glue and then cut the mouth out of white felt (foam actually works better but I didn't have any on hand and was impatient).  I realized that I did it crooked so I had to add another eye.  And he was looking a little shaggy so I had to trim some of my tulle.

I have been wanting a fun Halloween wreath and now I have one!!  and I also have an idea of dong some tulle wreaths for Thanksgiving and Christmas so stay tuned for those!!!

Thursday, June 13, 2013

DIY Thursday: Fourth of July Wreath


I made this wreath last year.  It was my first wreath I ever made.  It was really easy and fun to make.  I love the combination of our nations colors.  All you need a foam wreath, white, blue, and red yarn, and white buttons.

Wrap blue around the wreath, then wrap white and red around the wreath.  Then glue the white buttons on. 

Wednesday, March 13, 2013

Wild Card Wednesday: Spring Wreath


Spring is almost here.  I am eager to get outside and not be cooped up.  I thought I would invite spring by making a spring wreath.  I am ready to take down my winter one.  This wreath was easy and enjoyable to craft. 
Here is what you will need:
-Different colored fabric.  (I found precut and matching fabric bundle at Joann’s with five different colors)  I would say ¼ a yard of each. (If that)
-yarn (coordinating color with your fabric)
-jewels or buttons (for the center of the flowers
-ribbon
-1/4 yard of felt (I found some in the clearance section for &.38.  That’s a steal.)
-foam wreath
-fabric scissors
-cup, mug or anything circular ( a circle that is the size that you want your flowers to be

1.       Wrap the yarn around the wreath.  When finished tie a knot between the beginning and the end.  Then hot glue to wreath so it won’t unravel. 

2.       Trace circles onto fabric.  Cut out circles.  You will need 8 circles per flower

 
3.       Trace circles onto felt about the half the size of your fabric circles.  You will need one felt circle per flower. Cut out felt circles
4.       Take one circle and fold in half and then half again.

 
5.       Snip off a little of the point of the folded circle
6.       Do steps 4 and 5 to four of the circles.  These will be the bottom layer of your flower.

7.       Glue the four folded circles to the felt circle.  The center will make a square.

 
8.       Repeat steps 4 and 5 for the top layer of the flower
9.       Glue the other  four circles onto the top of the other folded circles
10.   Take a jewel or button and glue to the center of the flower

 
11.   Repeat step 4 through 10 to make other flowers.

 
12.   Glue the flowers to the wreath.

 
13.    Tie ribbon to wreath and hang up on the door. 

You can find this awesome post linked up to the following Fantastic Parties:


Thursday, February 21, 2013

DIY Thursday: Missionary Welcome Wreath

Ok so I didn't make this wreath but my mom did and I thought it too cute not to share.  My brother comes home from his mission in a week in a half. Wahoo!  Of course we are all excited.  The preparations started at least month ago with signs for the airport etc.  My mom who is very cute and creative made this cute wreath to put on the door for when he comes home.  She also plans to put the wreath out if she has the missionaries over for dinner. 

Here is what you will need to make this wreath;
-14 inch wire wreath
-19 ties(18 of them cut into 15 inch lengths)
-hot glue gun or fabric glue
-missionary tag sticker(found at Bennions crafts)
-Welcome sign
-white heavy cardstock
1. Wrap the ties around the wreath overlapping a little.  Use glue to hold them together.
2. Using the last tie that isn't cut, tie it into a bow and glue onto the wreath
3. Put the missionary tag sticker onto the cardstock. Then glue the tag onto the bow tied wreath

My mom then made a welcome sign for the wreath as well.  She printed welcome onto cordinating scrapbook paper and then modge podge the welcome to a thin wood rectangle. She then glued the welcome sign onto the wreath.  Way to go mom!


This will be so cute and fun to hang on my parents front door for him to see when he gets home. 
You can find this awesome post linked up to the following Fantastic Parties:


Thursday, December 20, 2012

DIY Thursday: Winter Wreath


I must like making wreaths. It gives my door-step that homey feel to it.  My yard or lack there of doesn't create that feeling at all.  I decided to do a Winter wreath instead of Christmas one because I could leave it up longer.  So I did a pinterest search and found one that I liked and took my own spin on it.  I think it turned out great.  I am excited to put it up soon. 

Things you will need for this project:
1. grapevine wreath.  (I got mine at walmart, but I saw them at michaels)

2. Pinecones

3. Spray Paint. (I got silver for the pine cones and blue for the wreath)
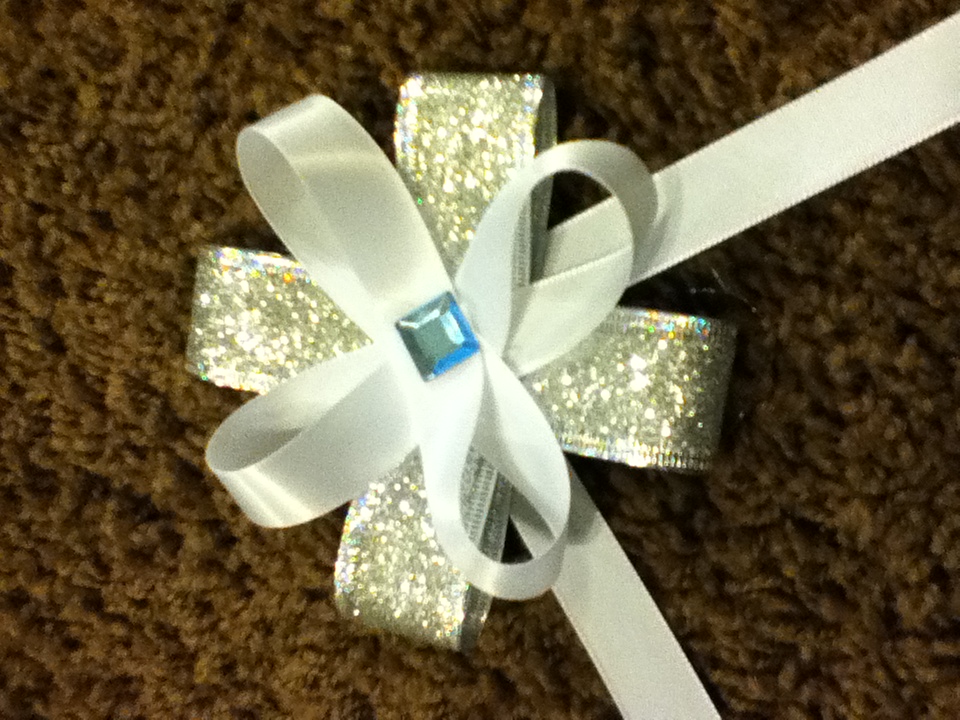
4. Two kinds of ribbon (I got one that silver/sparkles and white.)
5. Glue gun
6. gems


1. I started out by spray painting my wreath and pinecones.


2. Make bows.  I found this site on how to make this bow.  You can find it here.

3. Glue gems to middle of finished bows. 
4. Glue on pinecones and bows.
5. string ribbon through grape vine so you can hang it up.

This wreath was super easy and fun.  Hope you enjoy have fun making one too!


You can find this awesome post linked up to the following Fantastic Parties: