Showing posts with label Halloween. Show all posts

Wednesday, October 30, 2013

Wild Card Wednesday: Halloween Bark

I recently made this for a family Halloween party and it was a huge hit! Everyone loved it. I got the recipe off of I cook...he eats. The great thing about this oreo bark is that you can easily change some of the ingredients to fit whatever holiday you want. For example for Christmas you can use green mint oreos, crushed peppermint candies in place of candy corn with red and green Christmas sprinkles. For Valentines Day you could use pink filled oreos, with valentines day sprinkles and conversation hearts or something similar like that. Get creative and have fun with it. It is really tasty.


Halloween Oreo Bark:
  • One bag Halloween oreos broken up into quarters
  • 2 cups pretzels-broken up in pieces
  • 24 oz vanilla flavored almond bark
  • 1 cup candy corn
  • Black and orange sprinkles
Instructions:

Line a cookie sheet with wax paper and spread out your oreos, pretzels, and 3/4 cup candy corn. Place broken up almond bark in a microwave safe bowl and microwave for 1 1/2 minutes, stir, and then place in for 30 more seconds. Stir again and place in microwave for another 30 seconds if needed. Almond bark should be completely melted and smooth. Drizzle over oreo mixture and try to spread evenly over entire mixture. Sprinkle remaining candy corn and sprinkles over the top. Place in fridge to harden. Once it is completely hardened, take it out of the fridge, break it up into pieces and store in an airtight container. Enjoy!


Wednesday, October 9, 2013

Wildcard Wednesday: Starburst Candy Corn

 Just a quick review on this fun Halloween inspired candy. I was at Walmart the other day looking for pumpkin Hershey kisses, which I could not find. :( And saw these bad boys.
Being me, a lover of all things candy corn (my favorite is the pumpkin shaped ones) I could not pass up buying a bag. They cost me just under $2 and all in all it was not a bad investment. First of all they taste a lot like Starburst, my husband liked them a lot even though he is not a big fan of candy corn. And secondly they had the classic candy corn texture, which I was a big fan of. I am a huge texture person, its why i don't like fresh tomatoes.
ANYWAY... if you are looking for a fun colored, yummy new candy to try this holiday season give these a try. I think you will like them. :)

Monday, October 7, 2013

Trash Bag Spider Webs and Garlands

Here is a fun easy cheap and cute project that will cost you at most $1.00. Black Trash Bag Spider Webs! I got this idea from How About Orange created by Jessica Jones. Such a cute site by the way. Now I will allow her to tell you how to make the spider web, because she has a really great explanation but I want to show you another variation that I came up with my mistake. Trash Bag Spider Web Garlands.
Aren't they cute? This was totally an accident, I made by first spider web and it was awesome but the second time I forgot to follow the directions. he he. And I did not just do it once I did it twice. Sooo I really know how to do this well. First you just need to fold the trash bag just like you would for the spider web. Cut it into a square and then fold it three times to get a triangle that looks like this.


Now one difference in what How About Orange and I think is that she says to just do one side of the trash bag at a time. But that took me forever so i found that if I taped it like she said to, and was very careful,  that I could do two webs, or garlands at once. Now if you look above you will see the difference of how you position the triangle so you get the web or the garland. In the picture it kinda looks like I just flipped over the triangle but that would make no sense so let me talk or write through it. If you position the triangle with the center of the square or the completely folded side on the bottom you have the spider web. But if you rotate it so the top left point is now on the bottom then you have the garland version. Then you just continue with the steps. I draw my web with a sharpie like she suggested, then you cut it out.

Now when you open it up it will look like this. So don't freak out, it is alright.
Now all you have to do is cut two strips from one side like this.
How cute right? And if all else fails just wing it. I had another mishap and created a chandelier so just have fun with it and Happy Halloween!!

Friday, October 4, 2013

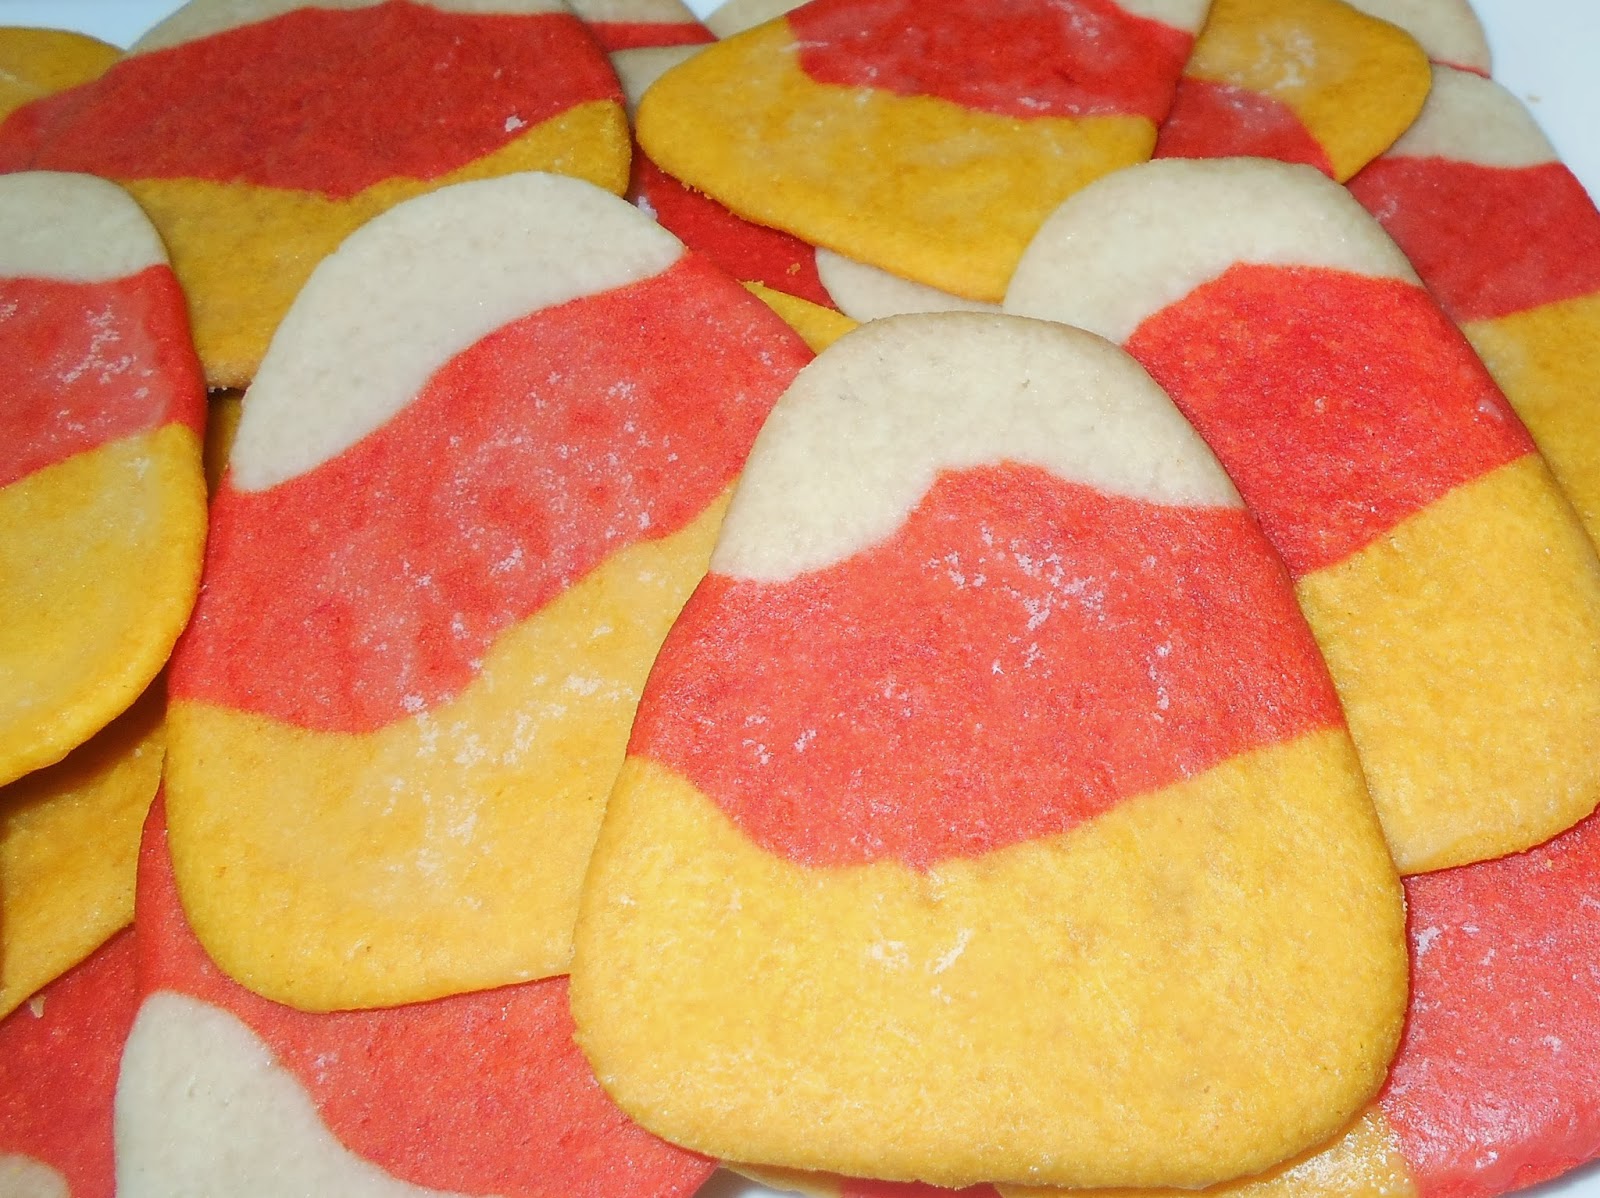
Candy Corn Cookies - Two Ways

Candy Corn Cookies!! Aren't they so festive? We tried this recipe last year and loved it so much we made it twice and remembered it enough to do it again this year. It is just a simple sugar cookie but it is really tasty, I got it from the TasteofHome website.
Ingredients:
  • 1-1/2 cups butter, softened
  • 1-1/2 cups sugar
  • 1/2 teaspoon vanilla extract
  • 3 cups all-purpose flour
  • 1 teaspoon baking soda
  • 1/2 teaspoon salt
  • Yellow and orange paste food coloring (I used liquid and it worked fine just took a bit more i suppose)
Directions:In a large bowl, cream butter and sugar until light and fluffy. Beat in vanilla. Combine flour, baking soda and salt; gradually add to creamed mixture and mix well.
Now there are two ways to form the shape of these yummy cookies and I have tried both. For the first way which is a bit simpler, split the dough into thirds and color one orange and one yellow leaving the last third white.
I stole the idea of how to shape the cookies from Kathie at her blog Kathie Cooks. Thanks Kathie, such a great idea. You take a bread loaf pan and line it with parchment paper or plastic wrap. (Just a tip, I used plastic wrap and it still had a hard time coming out. Try multiple layers.) Then just layer the dough in starting with orange then yellow then white. Try to make your layers as flat as possible.
Then put your pan in the fridge for two hour up to overnight. I did two hours and it worked great. Take your dough out of the fridge next and out of the pan, and slice it the short way in to 1/4 in slices. While you are slicing preheat your oven to 350.
Next cut your slices into triangle shapes. Squish in the corners so they look more rounded and place on your cookie sheet. (Another tip, I always cook my cookies on parchment paper so the bottoms don't brown as easily)
The second way may take a bit more time but I think it is worth it. You get bigger cookies and they all look like candy corn.
 Form your dough into a log and cut it into 6 equal parts.
 One section will stay white, the rest of them you can start by coloring it all yellow. (I just stuck mine back into the mixer and added the color in that way.)
 Take your yellow dough make a log again separate it into 5 sections. Leave three yellow and pop the other two back into the mixer and add your red to make orange.
 Then you layer them all together in gradually thinner layers.
 And form it into a Candy Corn shape.
 Wrap in plastic wrap and stick it in your fridge. It helps keep the shape if you pop your head in the fridge every once in awhile and turn the cookies, so all the sides stay flat.
 After a couple hours in the fridge all you do is cut them up and pop(I am saying pop a lot today...)them onto a baking sheet.
Bake for 7 to 10 min in either shape and voila! They should not be brown at all.
Ta DA!!! They are delicious and perfect. But... if you want to take them one step further like I did, you can glaze them!!! Yummo. It was just a simple glaze, I got the recipe from my handy dandy Joy of Cooking the 75th anniversary addition. (If you were wondering)
  • 1 cup powdered sugar
  • 2-3 tbs water
  • 1/4 tsp vanilla
That's all folks, mix it together and apply to your corn. I used a pastry brush, actually it might be a basting brush but whatever. I also doubled the glaze recipe because the above only makes 1/2 cup of glaze.  Then you place your cookies on cooling racks and brushed them and let them sit for 20-30 min so the glaze hardens up.
Oh they are so cute and so delicious. I want to try a lemon glaze on top next time. And do not let your lame significant other tease you about the fact that some of the colors are upside down on the cookies. (If you shape them the first way.) And if he or she does, no cookies for them!
Sorry about the two different qualities of pictures, the first were taken last year. Thank goodness I have a new camera, not perfect but better!!

Thursday, October 3, 2013

Wicked Witch Board

Me and my sister like to get crafty together.  One day, she showed me this picture and I knew it was perfect for my Halloween decorations.  It was pretty easy to do.  All I did was get a board ( you can have one cut a Home Depot) or even Joann's has some pre-cut, but use you a coupon. Then I painted it black.  I designed the lettering on my Silouette to fit my size board.  I think my board was around 12x20 but it would work doing it a bit smaller.  Then I just cut it in the different colors of vinyl, but you could do it all one color if you want.  Then Just add the embellishments you want: ribbon, wire, spiders, leaves, glitter, tulle, whatever floats your boat.  These are so easy to customize.  You could do a smaller one to make a door hanger.  If you wanted, you could even cut it out of cardstock or just regular stickers.

Here's another version too :-)

Wednesday, October 2, 2013

Halloween Photo Booth Props

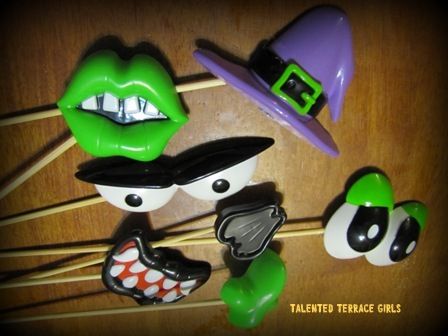
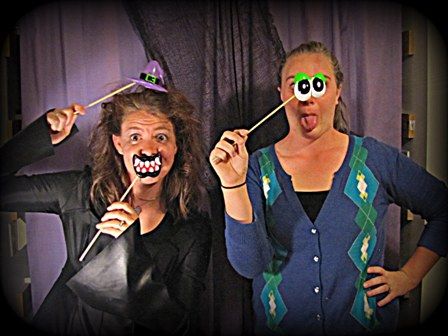
I love the photo booth craze going around. Mainly cause I love being crazy and taking pictures. I don't really love the printable paper props because I want something that will survive kids and multiple uses. First here are a few pictures of us playing in the photo booth cause lets be honest that is what this is about. Then I will show you pics and explain how to make these super easy props. 


See those fun props?
They are made with the plastic pumpkin push in decorations.
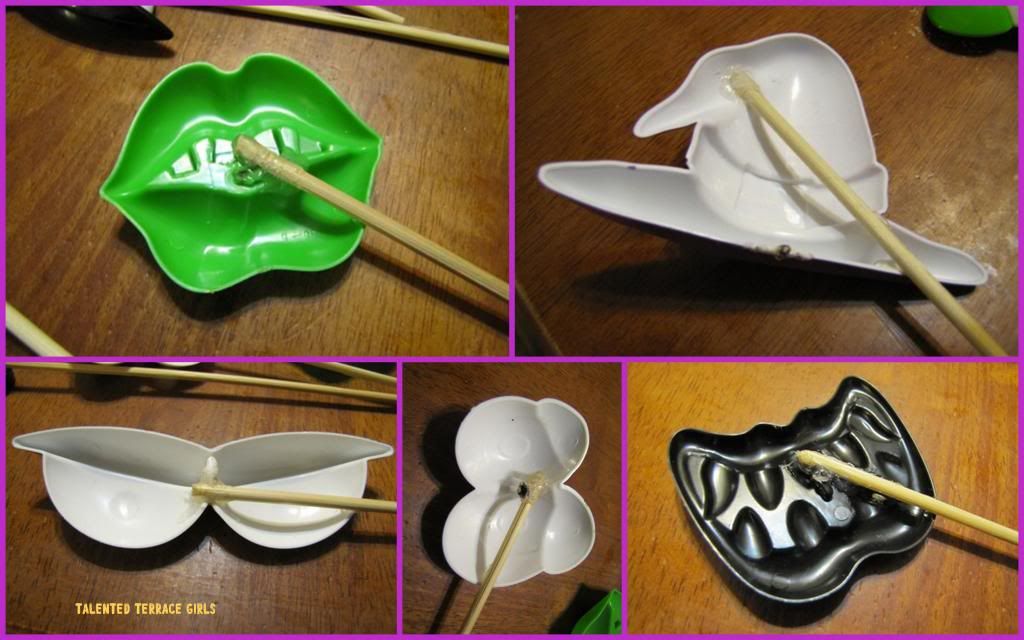
All I did was cut the spikey part off the back of the parts. I can't remember what I used (cause I am awful) but I either used scissors or my wire cutters. Then I used a lighter and melted the sharp parts just enough to make sure it was smooth
You can see some used examples of them in their pumpkins here, here or here

Then I used a skewer and hot glued it onto the back. I glued the skewers on at an angle to try to keep your hands off to the side and not in front of your face.
These are really sturdy and none of the skewers have popped off the back and they have been used multiple times and been stored for a year. 
Thanks and enjoy!! 


Tuesday, October 1, 2013

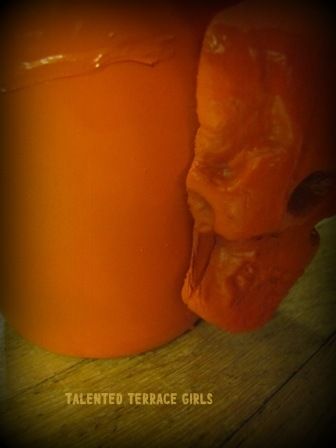
Skull Vase

First I want you all to know this vase is in backgrounds of numerous other pictures because I might have made it last year took pictures and didn't get it posted :( I know I am lame but I promise there are many many more posts like this.. yes I am meaning taken at least a year ago and then I finally get them up for you all to see. 
Also I took pictures as I made it and now I can't find them so good thing this is such an easy project.

Dollar Store Vase
Foam skull small enough for your vase
spray paint
adhesive
 First cut the back of your skull off! As you are cutting it off look at the curve of your vase and try to match it as close as possible so the skull will lay more flush making it look like 1 item. I used my kitchen bread knife and then a smaller knife and my nails to get the curve I needed. 

Then I glued the skull onto the vase. I used Elmers glue and it was BAD!!! If you look at my vase you can see streaks from where the glue ran while it was drying. Then I used hot glue and it melted part of my foam skull. So I would recommend using a glass adhesive ( I still don't have one cause I haven't glued anything else to glass) If you have to use one of the 2 mentioned I would go with Hot Glue it dries so much quicker and didn't streak. 
You have to be patient if you have a longer drying glue now is the time to leave your pretty vase and let it dry until tomorrow when you can paint it :)

 Now take your vase outside and spray paint it the color of your choice. I focused mainly on the outside of the vase because no one can tell you didn't do the inside. :) 

here is a background picture of the vase with crepe paper roses in the vase which I either need to make again or buy cheap dollar store Halloween flowers.