Showing posts with label birthday ideas. Show all posts

Wednesday, January 8, 2014

Wildcard Wednesday: Princess Cake

So there isn't a tutorial or recipe with this post.  I figured if someone wated a cute idea for a cake, I would jsut post a picture.  This was my baby girl's "smash" cake for her 1st birthday.  Since I knew it was going to smashed and made a mess, why waste time and money on something fancy so I just used box cake mix and canned frosting.  I just found a cute tiara for the top and in the cake isle there were these cute packets of sixlets that were pink and white so I put some on top.  It was pretty easy.  
Nothing fancy, but hey, it was for a 1 year old to make a mess of.

Thursday, November 21, 2013

DIY Book Safe

I try really hard to get people gifts that I know they will love, but there are some people that are harder than others. Like my brother in law. Love the man to death bu the is hard to shop for. So for his birthday this year I stalked him on Pinterest to try to get some ideas. And amid the video games and the pictures of tanks I found this fun idea. Make your own book safe. 


Thursday, September 19, 2013

DIY Thursday: My Little Pony Birthday Cake


So this year when I asked my daughter what kind of birthday cake she wanted she immediately replied saying she wanted a my little pony cake. I know my mom used to make us all sorts of character cakes for us kids when I was growing up so I asked her exactly how she did it and I went ahead and used her idea:) It was pretty easy and my daughter ended up really enjoying her cake which of course is the most important thing of all!


 Isn't it cute!

My little pony cake tutorial:

I first started by finding a picture of a my little pony character off the internet. You can also use one out of a coloring book if you can find a my little pony coloring book.

 I traced the outline of it on the back of the paper and then divided the picture up by equal spaced lines both vertically and horizontally.


I then traced the outline of my pan and then drew the outline of the pony using my scale I created. My pan was a large one, I think maybe a 12x15 or something like that, but I know that you can also use two round cake pans and create your shape that way as well.  Either way you are going to use to cake mixes.


 Bake your cake, lay it out on a cookie sheet and then place your outline on the cake. You will then cut around the outline to get your shape. This works best if you freeze the cake prior. It will also make frosting the cake easier as well.

 I then frosted the whole cake with some homemade strawberry buttercream frosting, focusing on barely covering the tail and maine area since I would be adding more frosting to those areas.

I outlined the shape of the pony using a red colored gel-You know the kind you can write with.

I then piped some more pink and then some purple frosting over the mane and tail area. I also used some purple to make a cutie mark for the pony.

The final step was to make the eye. I ended up drawing the eye on some paper and then carefully placing it on the cake.


Now you know how to create your own My Little Pony cake for that little special gal in your life! Any questions feel free to ask away:)


Tuesday, August 20, 2013

Sweet Tooth Tuesday: Chocolate Vanilla Swirled Cupcakes


Delicious and surprisingly easy these cupcakes were also made for my sisters bridal shower. The theme was tie dye but I thought that we should get some chocolate in there some how so this was my compromise.

I started out by making two cake batters, one vanilla and one chocolate. (Yes I used a box. I have a hard time bringing myself to make cake from scratch. I blame my Mom. She is an amazing cook and baker but cakes were never her thing.)


Look at my big (scary) helper.


I just used regular spoons to fill the cupcake wrappers. I alternated white and brown and ended up putting four spoonfuls total in each cup. It didn't take as long as it sounds. My pan is a little messy because I had so much "help".


Follow your recipes baking instructions.


They ended up really fun on the inside.


Next was the frosting. I used my families recipe for the vanilla frosting. It is super easy and really yummy.
Vanilla Frosting
1 1/2 lbs powdered sugar
1/2 cup milk
1 tsp vanilla
pinch salt

Whip it all together for a few min till thick and fluffy looking. You may want to start out with half the milk and add more as you need it.

And for the chocolate we have always loved the recipe on the back of the Hershey's Cocoa box.
"Perfectly Chocolate" Chocolate Frosting
1/2 cup butter
2/3 cup Cocoa
3 cups powdered sugar
1/3 cup milk
1 tsp vanilla

Melt butter. Stir in cocoa. Add powdered sugar and milk, beat on medium speed until desired consistency. Add more milk if needed. Stir in vanilla.

I was originally going to just try to dump the frosting in the piping bag, trying to get most of the chocolate on one side and most of the vanilla on the other, then hoping they would swirl together nicely. But while researching something else I came across this technique of filling a piping bag on The Sweet Adventures of Sugarbelle and thought it would be perfect for this. 

First you lay out a nice long piece of plastic wrap on your counter. Then you spoon one color of frosting in a line across the middle of the plastic wrap with the other color on top. (You could do as many colors or flavors as you want.) 

 Then you carefully wrap the sides of plastic over your frosting so it looks like a tube and twirl the ends till they are wrapped nice and tight.

Then you "thread" your tube through your piping bag pulling it down as far as it will go.


And cut off the extra plastic. If you have the cool piping bags with the removable tips you will want to do all this before adding your tip. I am not that cool. If you just leave the plastic near the end of your tip it will bunch up and not be pretty coming out. All you have to do is pull your tube of plastic back in your piping bag a bit so that the frosting will squeeze out and the plastic won't get in the way.


Next you swirl to your hearts content. I think they came out lovely. And yummy! My Dad ate three at the bridal shower alone.


Now I have ideas for all kinds of color and flavor mixes I could do with this same technique. Orange and vanilla, lemon and lime, chocolate and caramel. What do you think? 

Thursday, July 4, 2013

DIY Thursday: Zombie Survival Kit


We just celebrated my husbands birthday and after we both became fans of "The Walking Dead" recently I saw this amazing Pin on Pinterest where a father made a Zombie Survival Kit for his son, and decided I had to recreate it for him. Now I had grander plans for this and I have to admit that pregnancy exhaustion definitely got in the way of what I wanted to be the final product but I think it still turned out pretty well.

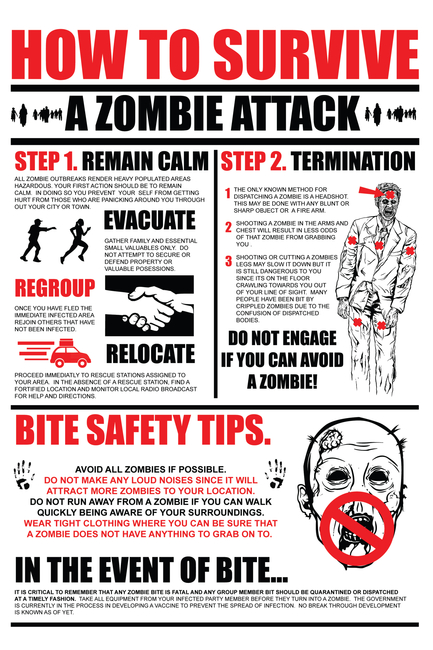
To start to get Terry (aka the husband) in the Zombie mood I had a bunch of posters made and posted them in his car, at the door as he came home from work and in his room.


Then he found the box. My little men helped me with the final bloody step of creating the box with a little red paint and their hands.


The rest was just a matter of wrapping up some of Terry's favorite treats and creating fun labels for them all. 


This is what it looked like when he opened the box.


I found some silly toys at the dollar store and some fake toilet paper that I think really added to the overall theme.


Really you can pick whatever treats you want, I chose stuff like Mt. Dew, snickers bar, cookies, those little boxes of Pop's like you get for the 4th of July, and a few other of his favorites. Just make sure to get a bunch of different shapes, it makes the final product more fun.


And yes I know that defense was spelled wrong. (Well I did after i made it any way.)


Its not shown in the pictures because we were waiting for it in the mail but we also got him this really neat book that takes all things zombie very seriously and makes you wonder if there really might ever be a zombie take over. BE PREPARED!!

Well to finish I really must tell you to check out my original pinspiration because it is amazing and I hope that both of these ideas inspire you to create some zombie fun of your own.