Wednesday, October 30, 2013

Wild Card Wednesday: Halloween Bark

I recently made this for a family Halloween party and it was a huge hit! Everyone loved it. I got the recipe off of I cook...he eats. The great thing about this oreo bark is that you can easily change some of the ingredients to fit whatever holiday you want. For example for Christmas you can use green mint oreos, crushed peppermint candies in place of candy corn with red and green Christmas sprinkles. For Valentines Day you could use pink filled oreos, with valentines day sprinkles and conversation hearts or something similar like that. Get creative and have fun with it. It is really tasty.


Halloween Oreo Bark:
  • One bag Halloween oreos broken up into quarters
  • 2 cups pretzels-broken up in pieces
  • 24 oz vanilla flavored almond bark
  • 1 cup candy corn
  • Black and orange sprinkles
Instructions:

Line a cookie sheet with wax paper and spread out your oreos, pretzels, and 3/4 cup candy corn. Place broken up almond bark in a microwave safe bowl and microwave for 1 1/2 minutes, stir, and then place in for 30 more seconds. Stir again and place in microwave for another 30 seconds if needed. Almond bark should be completely melted and smooth. Drizzle over oreo mixture and try to spread evenly over entire mixture. Sprinkle remaining candy corn and sprinkles over the top. Place in fridge to harden. Once it is completely hardened, take it out of the fridge, break it up into pieces and store in an airtight container. Enjoy!


Tuesday, October 29, 2013

Sweet Tooth Tuesday: Chocolate lasagna

Our birthday tradition is that the birthday person gets to choose their dessert and dinner.  I couldn't decide on my dinner but I knew what I wanted for dessert: Chocolate Lasagna!!  Since my hubby was making it, it had to be easy so this recipe doesn't require any cooking =) And he was creative and changed up the recipe...he made it mint chocolate...my favorite!!


(yes, I turned the dreaded 3-0 this year!!)


1 package regular Oreo cookies (Not Double Stuff) – about 36 cookies (we used the grasshopper Keebler ones)
6 Tablespoon butter, melted
1- 8 ounce package cream cheese, softened
1/4 cup granulated sugar
2 Tablespoons cold milk
1- 12 ounce tub Cool Whip, divided
2 – 3.9 ounce packages Chocolate Instant Pudding.
3 1/4 cups cold milk
1 and 1/2 cups mini chocolate chips (we used the Andes mint chocolate chips)

Begin by crushing 36 Oreo cookies. We recruited the help of our 4 year old...and a rolling pin.  He had some fun.  When the Oreos have turned into fine crumbs, you are done.
Combine the Oreo crumbs with 6 tablespoons melted butter. Press the mixture to a 9 x 13 inch baking dish. Press the crumbs into the bottom of the pan. Put the pan in the fridge while you mix the rest.

Mix the cream cheese with a mixer until light and fluffy. Add in 2 Tablespoons of milk, and sugar, and mix well. Stir in 1 and 1/4 cups Cool Whip. Spread this over the crust.

In a bowl, combine chocolate instant pudding with 3 and 1/4 cups cold milk. Whisk for several minutes until the pudding starts to thicken. Use a spatula to spread the mixture over the previous cream cheese layer. 

Allow the dessert to rest for about 5 minutes so that the pudding can firm up further.
Spread the remaining Cool Whip over the top. Sprinkle mini chips evenly over the top. Place in the freezer for 1 hour, or the refrigerator for 4 hours before serving.

(yes, those are finger smears....they may or may not match the size of my fingers....)

Friday, October 25, 2013

Foodie Friday: Chili Dog Casserole


I have to admit...I was a bit skeptical about this but my husband insisted we try it.  He loves chili dogs!!  But it was a hit with everyone! The best part, it is so easy!!!! Even your kids could make this!  


 2 (15 oz) cans chili with beans  (we actually did it with no beans)
1 (16 oz) package hot dogs
10 (8 inch) flour tortillas 
1 cup  Cheddar cheese, shredded

First, pour 1 can of chili in a baking dish.  I used the a 7x11, but you can use a 9x13.  Then, roll your hot dogs in the tortillas and place over chili.  Then pour the other can of chili over top and sprinkle with cheese.  Cover with foil and bake for 30 minutes at 425.  Let them stand and cool for a bit before you eat. 

I think this dish qualifies as "man food" and could be something to serve for game nights or whatever else men do.....


Monday, October 21, 2013

Pumpkin week: Dinner in a Pumpkin

Want a fun and unique seasonal meal? This is the one you wan to try then. Because it is an easy recipe and super fun for all. 

                              Dinner in a Pumpkin
1 pumpkin about 8 inches high          2 C. Rice, Cooked
2 Tbsp Margarine                            2 Cans cream of chicken soup
1 lb ground beef                               1 can sliced mushrooms, drained (I ignored) 
1/2 C. celery, chopped                     2 Tbsp soy sauce
1/2 C. onion, chopped                      2 Tbsp brown sugar
1/4 C. green pepper diced 

Cut the stem off the pumpkin and remove all the seeds and guts. Then brush the inside of the pumpkin with margarine. Brush outside with oil; place in the center of a greased baking sheet. Bake at 375 for 30 mins. Saute ground beef, celery, onion and green pepper. Add rice, soup, mushrooms, soy sauce and brown sugar. Spoon mixture into pumpkin and replace pumpkin stem. Bake at 375 for about 50-60 min or until the pumpkin is tender. 
 Okay now I am going to add my 2 cents :) I made this 2 years ago (haven't made this years yet) and if I remember right we reduced some of the bake time so just check it. It really depends on the thickness of your pumpkin.

My husband thought he hated pumpkins, but he loved this and we even cut off chunks of the pumpkin to eat separate from the main dish.


Friday, October 18, 2013

Pumpkin week: Pumpkin Spice bundt cake

Back I think 3 years ago my mom invited me to a Relief Society activity that was themed "everything pumpkin" held at her church building. We made some halloween luminaries similar to what Kayla made and posted not too long ago as well as had the opportunity to try out a ton of yummy pumpkin recipes. This recipe I am about share is one that came from that. The great part is that the recipe of each item was there so if you loved something you could have the recipe and could make it again!


Pumpkin Spice Bundt Cake
  • 1 15oz can pumpkin
  • 1 1/2 cup sugar
  • 1/2 cup each canola oil, buttermilk, and water
  • 2 eggs
  • 2 egg whites
  • 1 tsp vanilla
  • 2 cups flour
  • 1 Tbsp cocoa
  • 1 1/2 tsp cinnamon
  • 1 tsp each baking soda and baking powder
  • 1/2 tsp each salt, nutmeg, allspice,  cloves
  • 1/2 cup raisins (I didn't put these in cause I don't like raisins)
  • 1/4 cup chocolate chips
  • Powdered sugar
In a large bowl beat pumpkin, sugar, oil, buttermilk, water, eggs, egg whites, and vanilla until well blended. In a small bowl combine flour, cocoa, cinnamon, baking soda, baking powder, salt, nutmeg, aallspice,  and cloves. Gradually add to pumpkin mixture. Stir in raisins and chocolate chips. Pour into a greased bundt pan and bake at 350 for 50-60 minutes. Cool for 10 minutes before removing from pan. Place on cooling rack to cool completely and dust with powdered sugar. Serve with vanilla ice cream if desired. Enjoy!


Thursday, October 17, 2013

Pumpkin Melted Crayon Art


I have seen this idea everywhere and decided to try it for my self.  It was pretty easy...but I recommend using big pumpkins.  I used the little min pumpkins.  The results weren't exactly what I had intended but the kids were happy with it and that's what mattered since it was their project =)


all you do is take some broken crayons (and what mom doesn't have oodles of those?!) and stack them on top of the pumpkin. 
 Then take your blow dryer and depending on how big of  hurry you are in you can either put it on low or high (but if the crayons are small the high will blow them off and then they will melt on the counter....)  Let the wax drip wherever but you may need to tilt the pumpkin to help it run down.  Make sure and have a stack of newspaper underneath to catch the wax.  Or better yet, grab an extension cord and do it outside (it was raining when we did it so I couldn't).


I think the bigger ones would turn out awesome!


Wednesday, October 16, 2013

Pumpkin Week: Pumpkin Cinnamon Rolls


I love cinnamon rolls....I love pumpkin flavoring....so what better than to combine them together?  This is a perfect fall treat.  Especially warm out of the oven, on a cold day.

Dough
1/4 c. warm water
2 1/4 tsp yeast
1 c. milk
1/2 c. butter
1- 15 oz. can pumpkin puree
1 1/2 tsp. salt
1 egg
5 1/2 c. flour (may need more if the dough is too sticky)

Filling
1/2 c. butter, melted
1 c. brown sugar
2 tsp. cinnamon
1/2 tsp ginger
1/2 tsp. nutmeg
1/2 tsp. cloves

Stir the yeast into the water, and let it sit until it dissolves.
In a small saucepan, heat the milk and butter over low heat, stirring until the butter melts. Pour the sugar into the bowl of a stand mixer, and add the milk-butter mixture, stirring until the sugar has dissolved.
Let the mixture cool just a bit, until it’s about 100 to 110˚F. (It should feel warm, but not hot.) Stir in the dissolved yeast and the pumpkin puree, and mix until combined. Stir in the salt.
Dump 5 cups of the flour into the bowl, and stir until you’ve got a sticky ball of dough. If the dough isn’t coming together, stir the extra ½ cup of flour.

Now’s the part where you cover the dough and let it rise.  Let it sit for 1 to 3 hours, or until the ball of dough doubles in size.
Lightly dust a work surface with flour. Using a lightly floured rolling pin, roll the dough out into a half-inch-thick rectangle. (If the dough starts sticking to the rolling pin or the work surface, sprinkle a bit more flour over everything.)
Now make the filling: Place the butter in a microwave-safe dish and nuke it until it’s melted. In a separate bowl, combine brown sugar, cinnamon, and spices. Spread the butter evenly over the rolled-out dough, and sprinkle the brown sugar mixbut leave an inch of space along the top of the rectangle (should be a long edge, not a short edge)
Starting at the bottom edge, carefully roll the dough upwards into a log. Seal the roll by pinching it closed along the top.
Butter the sides and bottoms of two 9-by-13-inch baking dishes (you can also use 9-inch cake pans). Slice the log into 16 to 18 rolls, about 1 to 1½ inches thick.I used embroidery thread to cut my rolls so they don't get smushed by the knife Put the rolls into the baking dishes, making sure they have a little room to rise.

If you’re going to bake the rolls immediately, cover them with a clean dishtowel and let them rise for about 30 minutes, until they get puffy. If you’re going to bake the rolls later, cover them with plastic wrap and put them in the refrigerator — when you’re ready to bake, let them sit on the counter and rise for 1 hour before putting them in the oven.
Bake the rolls at 375°F for 20 to 25 minutes, rotating the baking dishes halfway through cooking. 

When the rolls are golden brown , take them out of the oven. Let them cool for about 5 minutes, Then putyour favorite cinnamon roll frosting on top.  

For my frosting, I don't really have a recipe. I used cream cheese (for this recipe I used 2 8 oz. blocks) and whip them in the mixer.  I added about 1- 1 1/2 tbsp. of vanilla and then powdered sugar.  I did it to taste, but I don't like it overly sweet so I didn't use a ton, maybe 1 1/2 c. but I didn't measure.  Then I just added about 2- 3 tbsp milk to thin it out.

Tuesday, October 15, 2013

Pumpkin Week: Pumpkin Pancakes with Cinnamon Syrup


Hey everyone Tiffany here! So this week is all about pumpkin and I found this recipe off of tastesbetterfromscratch.com and it was so good that I just had to share. If you love pumpkin then you will love these.

Pumkin pancakes with cinnamon syrup
Yields 6


  • 1 cup flour
  • 1 1/2 Tbsp brown sugar
  • 1 tsp baking powder
  • 1/2 tsp baking soda
  • 1/2 tsp all spice
  • 1/2 tsp cinnamob
  • 1/4 tsp salt
  • 3/4 cup milk
  • 1/2 cup pumpkin puree
  • 1 egg
  • 1Tbsp oil
  • 1Tbsp vinegar
In a bowl combine dry ingredients and set aside. Combine wet ingredients in a bowl and then add your dry ingredients to the pumpkin mixture and mix. Heat an oiled pan or griddle on medium high heat. Pour 1/4 cup batter for each pancake. Each side should be a lightly browned. Serve hot.

Cinnamon syrup

  • 1/2 cup sugar
  • 1/2 cup brown sugar
  • 2 Tbsp flour
  • 1 tsp cinnamon
  • 1 tsp vanilla
  • 1 cup water
Stir all ingredients in a small saucepan over medium heat until boiling. Let it boil for a few minutes to thicken. Remove from heat and set aside until needed.


Yummy!!!

Monday, October 14, 2013

Pumpkin Week: Round up

I think all of us here at Talented terrace Girls kinda like pumpkin stuff...whether it is recipes, crafts, or whatever...we like using pumpkins.  so here is a round up of all we have done in teh past with pumpkins and look for some more ideas the rest of the week!


Thursday, October 10, 2013

DIY Thursday: Autumn Subway Art (free printable)

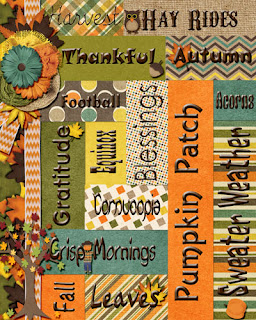
I see people always having these cute subway art things.  I made one out of vinyl that turned out super cute but that doesn't really work for those who don't have vinyl cutters....so when I found this I was excited.  For a scrapbook challenge we were given a template and told do change it up and do whatever we wanted.  I love the colors of Leaving a Legacy's Happy Fall Ya'll" kit.  It has become one of my favorites.  I love the turquoise in it. Here is my version. Lucky for you I am giving you the link to download your own!  Yay!! There are 2 sizes for you, 8x11 and 5x7.  I hope you enjoy!!!


Wednesday, October 9, 2013

Wildcard Wednesday: Starburst Candy Corn

 Just a quick review on this fun Halloween inspired candy. I was at Walmart the other day looking for pumpkin Hershey kisses, which I could not find. :( And saw these bad boys.
Being me, a lover of all things candy corn (my favorite is the pumpkin shaped ones) I could not pass up buying a bag. They cost me just under $2 and all in all it was not a bad investment. First of all they taste a lot like Starburst, my husband liked them a lot even though he is not a big fan of candy corn. And secondly they had the classic candy corn texture, which I was a big fan of. I am a huge texture person, its why i don't like fresh tomatoes.
ANYWAY... if you are looking for a fun colored, yummy new candy to try this holiday season give these a try. I think you will like them. :)

Tuesday, October 8, 2013

Sweet Tooth Tuesday: Strawberry lemonade brownies

Do you like Strawberry Lemonade?  These brownies are that...in food form!!  They are super yummy!  They were a nice break from the chocolate recipes I usually do.  Instead of the lemon glaze, I got some of my homemade freezer strawberry jam and poured it over top.  It was fabulous!!
Ingredients
½
cup unsalted butter, softened
¾
cup flour
2
eggs, large
2
tbsp lemon zest
2
tbsp lemon juice
¾
cup granulated sugar
¼
teaspoon sea salt
For the tart lemon glaze (I didn't do the glaze, but if you want it, here's the recipe):
4
tbsp lemon juice
8
tsp lemon zest
1
cup icing sugar
Directions
1. Preheat the oven to 350 degrees.
 Grease an 8×8 inch baking dish with butter and set aside. Zest and juice two lemons and set aside. In the bowl of an electric mixture fitted with the paddle attachment, beat the flour, sugar, salt, and softened butter until combined. In a separate bowl, whisk together the eggs, lemon zest, and lemon juice until combined. Pour it into the flour mixture and beat for 2 mins at medium speed until smooth and creamy.  Pour into baking dish and bake for 23-25 mins, should turn golden around the edges. Allow to cool completely before glazing. Do not overbake, or the bars will dry.. Filter the powdered sugar and whisk with lemon zest and juice.  Spread the glaze over the brownies with a rubber spatula and let glaze set. Cut into bars and serve. 

Monday, October 7, 2013

Trash Bag Spider Webs and Garlands

Here is a fun easy cheap and cute project that will cost you at most $1.00. Black Trash Bag Spider Webs! I got this idea from How About Orange created by Jessica Jones. Such a cute site by the way. Now I will allow her to tell you how to make the spider web, because she has a really great explanation but I want to show you another variation that I came up with my mistake. Trash Bag Spider Web Garlands.
Aren't they cute? This was totally an accident, I made by first spider web and it was awesome but the second time I forgot to follow the directions. he he. And I did not just do it once I did it twice. Sooo I really know how to do this well. First you just need to fold the trash bag just like you would for the spider web. Cut it into a square and then fold it three times to get a triangle that looks like this.


Now one difference in what How About Orange and I think is that she says to just do one side of the trash bag at a time. But that took me forever so i found that if I taped it like she said to, and was very careful,  that I could do two webs, or garlands at once. Now if you look above you will see the difference of how you position the triangle so you get the web or the garland. In the picture it kinda looks like I just flipped over the triangle but that would make no sense so let me talk or write through it. If you position the triangle with the center of the square or the completely folded side on the bottom you have the spider web. But if you rotate it so the top left point is now on the bottom then you have the garland version. Then you just continue with the steps. I draw my web with a sharpie like she suggested, then you cut it out.

Now when you open it up it will look like this. So don't freak out, it is alright.
Now all you have to do is cut two strips from one side like this.
How cute right? And if all else fails just wing it. I had another mishap and created a chandelier so just have fun with it and Happy Halloween!!