Friday, September 30, 2011

Foodie Friday: Veggies & More


Over the last 1 1/2 years I have been gradually introducing my family to vegetarian recipes. I could very easily cook this way every day, but my husband and kids would really miss the meat in everything else.
One of the problems with cooking vegetarian style foods is that I have had to make things that don't always have the typical tofu based proteins. I don't mind tofu, when cooked right, but the kids just won't eat it. As an alternative to give us the protein that we need as well as the benefits of whole grain, I have been using a lot of quinoa. This is another item that I originally found at the health food store. Lately, though I have been buying in the bulk section at Winco. Can I just say that I absolutely love their bulk section. :) Quinoa does need to be rinsed off in a sieve before cooking/eating. If not it has a slightly metallic taste.

This recipe is one that I found in a vergetarian cookbook that a friend passed on to me. My two youngest children weren't too sure about what I was feeding them, but once they tried eating it one part at a time, they were excited to try something new.


AZTEC PLATTER

This consists of two different salads, layered one on top of the other.

Quinoa-corn Salad
1 cup quinoa, well rinsed
1 cup thawed frozen corn kernels
Juice of 1 lemon
1 TBLS oil
2-3 green onions, minced
Salt and pepper to taste

Bean Salad
1 one-lb. can black beans, or your preference
1 heaping cup finely diced ripe tomatoes
1 TBSP apple cider vinegar or basalmic vinegar
1/4 cup chopped, fresh parsely or 1/2 TBSP dried parsley flakes
Pepper, to taste
Ideas for garnishes: Pumpkin seeds, black olives, 1 medium red pepper, cut into stripes

Bring 2 cups of water to boil in a feavy saucepan. Add the quinoa and simmer gently, covered, for 15 minutes. When the quinoa is done, remove it from the heat, fluff witha fok and transfer it to a mixing bowl. Combine the quinoa with the remaining ingredients for the quinoa-corn salad and toss well.
While the quinoa is cooking, combine all the ingredients for the bean salad in another bowl and toss together.
To assemble, transfer the quinoa-corn salad onto a large platter and spread evenly to with in an inch of the edge. Pushing the salad outward from the center and make a well in the center of the platter, about 5 inches in diameter. Mount the bean salad into the well and serve.

Thursday, September 29, 2011

DIY Thursday: Trick or Treat Seasonal Blocks

Every time I walk into Quilted Bear I see so many cute decorations.  If I had free rein in that store, I could get into some major trouble.  I especially love the holiday stuff.  I have been wanting to make some holiday blocks for awhile, so I figured, Halloween is coming next month, I might as well get going now.  I was happy with how cute they turned out.


First, go to your local Home Depot or Lowe's.  Grab a 2x4 (preferably one without a lot of knots).  Have the nice person in the lumber department cut your blocks for you.  I had them cut 3 inch, 5 inch and 7 inch, but you can do as big as you want.  You will be left with the rest of the 2x4, but stay tuned and I'm sure we'll be coming up with some more uses for the wood.

Get out your sandpaper and smooth the corners and edges and surface, if needed.  Then grab your paint brushes and paint and paint each block whatever color you want.  Since this was for Halloween, I did purple, green, and orange.  I had to do 2 coats of paint.  I also painted some glitter paint to give it a little sparkle =)

Next, gather some ribbons, papers, stickers, buttons, whatever you want.  I found a pack of cute Halloween paper at Michael's and there was some ribbon that matched.  Then I figured, it needs some candy stickers since it's about trick-or-treat =)  Now this is where you get to be creative.  Decided where you want the papers, and what size.  Once you got that, get out the modge podge, paint the block where you are placing the paper.  then place the paper.  Let it dry completely before moving on.

Next, you can either use your handy dandy cricut and cut out vinyl letters, use some colored paper, or use the sticker packs of already cut out letters.  I love my cricut so I did some vinyl lettering.  Make sure to measure that each word will fit your blocks, measure each block and word (mine almost didn't fit because I measured wrong and didn't measure each block).  Place the lettering on your blocks.  Once you have it positioned, go over the whole thing with some more modge podge.  Let it dry completely again.  Place your stickers, ribbons, or buttons or whatever you chose wherever you want.  Easy, huh?  And lots cheaper than the ones I see at Quilted Bear.  The only thing I bought special for this was the blocks, which a 2x4 is $2-$3 and the stickers which were $1.50.  I already had the vinyl, I was using the scrapbook paper to do my Halloween scrapbook pages (which turned out super cute too!) and I already had the paints, but they are only $1.40 each.  So not too bad =)  It's all about using what you got =)


Wednesday, September 28, 2011

Wild Card Wednesday : General Conference Folders

LDS General Conference will be taking place soon, so which means it's time to get those conference folders ready! The folders have writing pages for me, so I can take copious notes and write the things that speak to my heart. I found the cutest pages at Prepared Not Scared.... And can I just say that site is amazing! My daughter's folder has some cute activity pages I found at SugarDoodle. (And these AMAZING pocket folders were found here)
For all those that are watching General Conference- I know we will find the inspiration and spirit to guide as through the next 6 months! Doesn't it seem like conference comes around just when we need it most? :)

Tuesday, September 27, 2011

Sweet Tooth Tuesday : Apple Streusel Muffins=YUM!

These have been a favorite weekend morning breakfast at our house for a while. We are usually busy running here and there, and these are PERFECT to grab & go. The leftover muffins are delicious as well!

2 c. Flour
1/2 t. Baking Powder
1/2 t. Salt
1/2 c. Softened Butter
1 c. Sugar
1 t. Nutmeg
2 Eggs
1 1/4t. Vanilla
1 1/2 c. Cubed apples

1. Prehead oven to 375 and grease or line a 12-muffin pan.
2. Mix Flour, Baking Powder, Baking Soda, Nutmeg and Salt in a large bowl.
3. In a smaller bowl, beat butter, sugar and eggs together until smooth. Then mix in the vanilla.
4. Stir the apples into the butter mixture. Then gradually add to the flour mixture, mixing well. Spoon the mixure into prepared pan.
5. For streusel topping, mixt 1/2 c. Brown Sugar, 2 Tbsp. Flour, 1/4 tsp. Cinnamon, and 1 Tbsp. Softened butter. Sprinkle over the muffins in the pan before baking.
6. Bake for 20-25 minutes or until a toothpick inserted in the center comes out clean.

SOOOOOO good. But just a tip. *Don't chop the apples up too small!!*

Monday, September 26, 2011

Munchkin Monday : Homemade Cheese Crackers & Giveaway Winner

First off, we have a winner to announce!

Congrats to Telsha Winger!

Here's a pic of what you've won {minus two prizes}!


-Now onto our regular scheduled post-

I love finding a good recipe.

I love spending time with my kids.

For the most part, my kids stay out of the kitchen. They know it's my domain, and it's very hard for me to just let them help {ie..make a mess} without interferring.

I bypassed these feelings though, and had my two older ones try out a recipe that looked easy, yummy & fun to make.

Here's where I got the recipe: Homemade Goldfish Crackers
Here's how I made ours:
First, Cheese. 8 ounces to be exact. If you don't have a kitchen scale, you should invest in one. They're not badly priced. Heck, I've even seen them at Ross. It nice to have it around, and works great when you want the right-sized burger. As you can see in the photo, I have a mixture of cheeses. I used cheddar, and then some italian blend cheese.
Second, Flour. I used Whole Wheat. I'm healthy like that.
Third, Butter.
Fourth, Salt.
Pulse all the ingredients until you get that coarse, crumbly texture.
-Course, Crumbly Texture-
For the final ingredient, Water. Turn the food processor on and add water. With the whole wheat flour, it took 4 tablespoons of water to have the dough come out like this:
Wrap up dough, and stick it in the fridge to chill down.
I prepared the dougn earlier in the day, and when all kids were done with school, I prepped the scene :
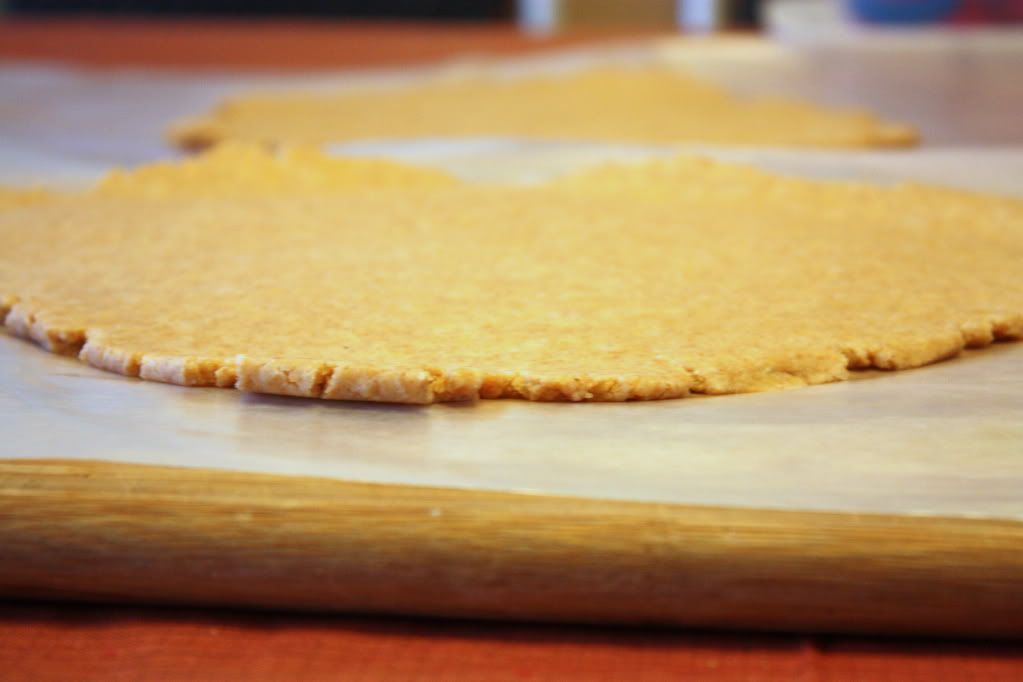
I took the dough out and let it sit for 10 minutes. I then split it into two, and rolled them out. The thinner you roll, the crispier the cracker.
My boys loved playing with the cookie cutters.
These were the smallest cutters that I had around the house.
Bake in a 350 degree oven for 15 minutes. I was happy. They puffed up & baked really well.
I thought they kind of tasted liked biscuits, and I think that's because I didn't roll out the dough super thin. They taste good nonetheless, and my kids had fun making them :)


Mouthwatering Mondays

Friday, September 23, 2011

Foodie Friday : Roasted Tomato & Tomatillo Soup

{Did you see the Giveaway we're doing this week???? Make sure you check out the post & enter!  It closes tomorrow!}


Fall weather is almost here!!! I am loving the cooler temps, and I can see the leaves changing colors. Along with the changing seasons, my garden is going into full-blown harvest time.


This is maybe a third of what I could have picked today.....and I only picked tomatoes and tomatillos...I passed over: zucchini, cucumbers, peppers, beets, and cabbage. I only picked what I wanted to use in dinner that night.

I decided to make a big batch of soup. Why??? Well, it's not summer anymore, it freezes well, and it gave me a chance to use up some of this freshness.

This soup is so easy to put together, and although it takes time {because we're developing flavors}, it's the kind of time where you don't have to watch it.

First off, grab some tomatoes & tomatillos. Mine filled up two sheet trays. I don't know how many pounds, but I guess I could count up how many tomato halves there are........36 Roma Tomatoes and.......I don't know, let's say 20-30 Tomatillos {that's a good number}


Place everything on the cookie sheets; sprinkle with EVOO & salt & Pepper. See easy. Roast in a 450 degree oven for an hour. This is what they'll most likely look like:


Charred {in some places} and all sorts of yummy. Excuse the peppers....they're for another recipe & I figured since I was getting the oven hot, I might as well roast some up.

Take all the roasted veggies and throw them in the blender. I did this twice. Puree everything up.


And stick it in a pot. I love this dutch oven.....I just thought I would let you know ;)


Now, for some flavoring, because right now it tastes like spaghettios. I grabbed some of my fresh basil from the garden, julienned it up, and added it into the pot.


Next, I decided to go crazy, and wanted to give it some heat. So in went 1/2 tsp of Crushed Red Pepper flakes. You can totally leave this out, or lessen, or even increase....do as you desire :)


And then I added 1 tsp of garlic powder. I didn't have any fresh garlic, or else I would have roasted a couple of cloves to throw in.


Stir everything together and stick it on the stove, on low heat, for at least an hour {stirring occasionally}. We want the flavors to develop and infuse into the tomatoes.
Here is the finished product:


All sorts of yummy and delicious.

Want to make it even better???
Add some freshly made focaccia bread to dip into.


My kids had fun dipping into their soups. I think Madi had too much fun though....she had soup everywhere {thank goodness for bibs!}


This is sooooo much better than soup out of the can. Give it a try.


Enjoy!


Join  us Saturdays at tatertotsandjello.com for the weekend wrap 
 up           party!


Mouthwatering Mondays