Friday, January 6, 2012

Scarf week 2012:Yarn Scarfs with a twist

I am really getting into the scarfs this winter, sadly there is NO snow which makes me very very sad. Maybe my little family should move up to Alaska, because then I would have a chance to actually wear and use my fun scarfs. I even tried wearing the fun purple one (from this post) today and it was still too warm! I was getting too hot and had to take it off :(


I found the basic ideas for these scarfs on pinterest, which led me to the Martha Stewart website.  I loved that they use YARN but NO crocheting or knitting because quite honestly, I am crappy at both those mediums. I do love counted crosstitching which is time consuming and you have to count, but with crocheting I can never keep count, keep my stitches even and I have never cared enough to learn it well :) I have family and friends who LOVE it and I can appreciate their hard work and warm blankets, but for me I will find other ways to use the yarn!

Okay, first, I am going to teach you how to make the thick, soft purple scarf. Go to your local craft store and buy some fat and soft yarn. (50yds). I bought only 25 yds the first time and had to go back to my Hobby Lobby and buy a second skein. This scarf is my most expensive one because each skein was $6.99, so it was $14. Now if you bought yours on sale you could greatly reduce the cost. Unfortunately for me, I went on an impulse buying day.  Maybe that makes me lucky though, because I got some SWEET yarn!! Okay, okay, I will get on track now.... 50 yds of yarn.

Cut the yarn into 140-inch pieces. You will need 12 cut pieces. Yes, you really use it all and it isn't too long (like my black one was).  Look at the picture under this and see how I grouped them into 3 strands for each one?  I used painters tape and secured it to my cutting mat.  I choose to use my mat so I could make sure my SQUARE KNOTS were even. Yes, this whole things is with square knots that is all. I also measured the difference between mine. I taped them inside 1 inch and spaced them with an inch in between. . DO NOT START AT AN END!!!!! start in the MIDDLE!! I know that may sound weird but it means you have less yarn to pull through each time you tie a knot and it will make your process much much quicker and less frustrating.


I started from the outside and tied the square knot. Right over left, left over right. If you have a square knot correct it wont slip all around. Now go down, tying alternating between 2 on the outside and the inner 2 tied together. The inside gets used quicker than the outer 2 so when you are done just trim the ends to your liking. I liked the jagged not really matching ends.


Here I am taking my own pics and trying to show off the scarf. I edited it to whitewash me out so you could focus on just the scarf! And this helped to see the ties better


Okay after my husband heard what I was making he said, "I know how to do a weaving chain. What if we could do that and tie it the same way and use the basic yarn (cheaper) and still have a fun scarf." So of course I said yes!! I wanted to see what my husband meant by a weaving chain.

Here is the weaving chain scarf:


After going to the store again, my man (Scott) grabs the yarn and with a little instruction from my mom on how to get it pulled out of the skein, He dove right in and started weaving. 

Quote from Scott, "To start, you use your left hand, and have the yarn wrap around your middle finger. The tail should be about 6 inches, and it should be on the side your thumb is on. Then, wrap 1 loop around your three fingers, starting on the index finger side, and ending around your ring finger. You will only have one loop to pull, from your middle finger. When you do another wrap from index to ring finger, and then you will have 3 loops to use until you are done."

Then he would wrap and pull the bottom up and over the fingers and then wrap the yarn again.  Does that make any sense? Huh you say??  Well I said the same thing as he explained it to me. So I took a video of him doing a couple of stitches.
I hope this helps you understand the weaving if not leave a comment and I will explain it better (I hope)


For now it is on my photobucket until I can either do youtube or get my husband to fix it for me!! 


One nice thing about my husband making my chains, besides the obvious of him doing the work and not me, he has these big MAN fingers so the stitches were really big (like using a big hook!) and each wrap stitch is 1 inch for him.  The chains were really quick for him to whip out
because these chains were fat and airy. We decided that we would try it with just 4 chains at 140 inches long just like the purple one, and that should be enough. (as I was tying the blue one I realized doing this with 5 or 6 wide might be really nice as these are thinner than the purple)  All 4 chains ready to tie into a scarf. When you complete the chains you need to go back and secure the ends. As Scott would say "just tie a fishing hook knot!" WHAT?!  Ya, I said the same thing so here is a second video so you can see how he ends it 


 Tape them down again!


And off I go with my tying! 


Your inside strands are going to run out quicker than your outside so you can make your inners 5-10 inches longer than the outer 2, or as you are tying them you can kind of pull a fast one on the yarn and get them to switch sides (kind of tricky). 


Here are the 2 piled together so you can see the thickness difference. 


 Enjoy! Good luck getting your husbands to use their man fingers to weave you a couple of chains too! 

Confessions of a Stay At Home Mommy

Thursday, January 5, 2012

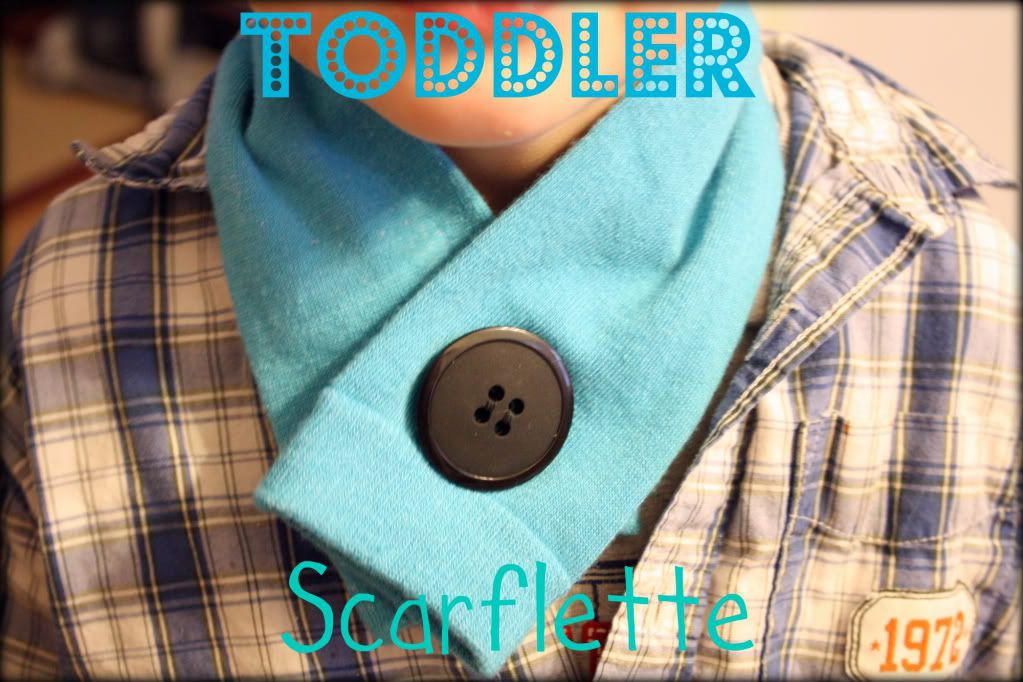
Scarf Week 2012 : Toddler Scarflette


Whoohoo for scarfs!  I think scarves are the one thing over the past couple of years that have not gone out in style.  It's a very accessible accessory for everyone.

When Teresa said that she wanted to have a Scarf week, I was excited to whip up some that I've seen floating around blogland the last year or so.

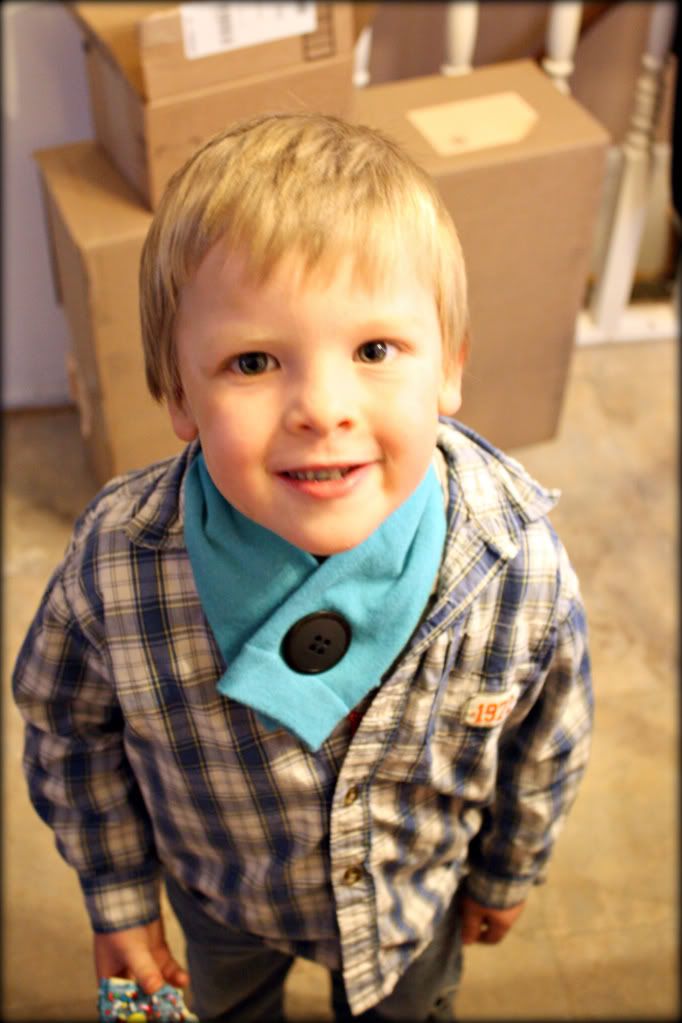
I decided that my little girl needed to have a little somethin'-somethin' so I made her this:


Cuteness!!!
 {although it's my boy modeling it because his sister did not want her picture taken}

This was soooo easy to make.....Seriously.  And it was cheap as well.  Since I was making this for my little one, I went to Ross's to find some knee high socks.


Are they just cute??  I found these in the little girl section, and I think it cost me $3.50 for the two of them.  If you want something a little longer, head over to the Woman's section and buy the knee highs {but it'll cost ya a few bucks more}.

I found my buttons at Walmart.  $1.19 for the two big black buttons-not bad I say.

I also bought a little thing of velcro at Wal-mart {because I didn't have any at home} which was under a dollar.


Isn't he cute anyway??

If you would like to make one for yourself or little one, click on the link below:
It's a great tutorial!

Thanks for stopping by!

Wednesday, January 4, 2012

Scarf Week 2012: Little Girl's Ruffle Scarf


I was inspired by a scarf my sister made and wanted to know how to make it.  She led me to this blogger's tutorial:  
It was so easy to make and my little girl loved it! 
Since I am not so good at making button holes I made a flower with the leftover ruffles and glued a pin on back! 

Keeps her neck toasty warm and also makes a great fashion statement =)
I'm thinking that I need one too!!!
This one is without the flower pin...cute this way too!

I’m Linking up to these Awesome Blogs!

Tuesday, January 3, 2012

Scarf Week 2012: T-shirt scarfs


Hi Hi Hi!! Happy New Year Friends!! I hope you all have fun goals and dreams you are going to achomplish this year. I know i have some fun things i want to do (some of my goals, my husband says NO and some he says we will try). I want to become a stay at home mom by the end of this year, I am sooooooo done working full time, I also want to take 2 yes 2 trips! (these are ones without my KIDS and without my HUSBAND!) I want to also take a few trips with them too, but for now i am trying to plan and fanagle 2 trips for ME!!  I also just want to be more healthy and maybe stop making cupcakes once a week. I want to be more consistant in my working out, playing indoor soccer for 8-24 times a year shouldn't count as all the excersize i do :(  I also want to schedule my blog posts in a more timely manner and not collect cool posts to share (I have about 20 or more collected), but I will actually DO the posts and share the fun with you all! I am hoping because i posted these goals I will force myself to be more accountable and actually stop procastinating everything. What are some of your goals???

This year i am LOVING the infinity scarf style. Why have i never used this technique before? I love not having to rewrap the scarf again, again, and again. It just stays on and looks cool or keeps you warm. For those who don't know an Infinity scarf is like a doughnut scarf, a ring, never ending, a circular masterpiece!

The first scarf is just a basic infinity scarf made from an old t-shirt. all you do is lay your shirt out flat and cut off the top part. from the armpits up to the neck cut (save for other fun projects) and the bottom part that is a tube is what makes your scarf. Now all you do is STRETCH!!! Not your leg muscles stretch the shirt and make that tube become a raft! now that it is larger you can wrap the scarf around your neck and stay toasty warm! I want to add a few t-shirt flowers to mine to spruce it up and make it a little more SASSY. 


 My husband (scott) told me i had to smile but I wanted the sassy pic cause i think it makes me look HOT! hehehe

Scarf #2!
This is another t-shirt scarf and was really quite easy to make. I found it on pinterest from this fun blog.

Lay an old shirt and cut 1 inch strips. I got 16 from my shirt, but because i used my husbands XL my circles were larger than i had planned so using all 16 made my scarf just a tad too long so i will be taking 3-4 off to make it the length i want it to be.

This is to help you see how twist the loops into circles to make it more thick than just a flimsy little 1 loop! We want the thick 4 looper.

All my fun loops folded together


Now take strips about 1x4 from the left over top part of the shirt and tie the circles together with a square knot. Make sure you stretch your t-shirt ties out a little so that as you wear it it doesn't stretch then making weird gaps (i might be speaking from experience). The remaining shirt makes great t-shirt flowers that can then be attached to your awesome $1 Cheetah print shoes to make them even more sassy and fun! (I will show you a pic later)


I know the pics are not great i was tired and having a lazy evening.


Enjoy the fun scarfs and lets hope for MORE snow so we can actually enjoy our scarfs!!!!!!!!!


I’m Linking up to these Awesome Blogs!

Monday, January 2, 2012

Scarf Week 2012: Braid Circle Scarf


This was so easy and it turned out really cute. It took me about 20 min
I just used some extra fabric that i had laying around. This is so up to you on the amount of braid you want or how full you want it. You will have to judge according to what you want.
I used about a yard for this. I ripped about half of my fabric into strips all different sizes. and then braided then. I went small and then got bigger.
After they were all braided I sewed them all together. I cut the rest of the fabric into thicker strips(again depending on how full you want it)
sew them all together in a circle.

wrap it around and put a flower clip or some feathers. Your done!
How cute!
One tip If you want a pattern then maybe go with a fleece or something that has a pattern on both sides. when you braid it, it will show that it is lighter. I wish I would have used a solid color but it still turned out cute


Linking up to these Fabulous sites!
Made by You Mondays {Skip to My Lou}

Confessions of a Stay At Home Mommy