Friday, March 28, 2014

Chocolate Nutella Cupcakes

You know when you get that craving to something sweet and chocolatey. Well this cupcake will definintely satisfy that craving. Chocolate and hazelnut coming together is the perfect combination! Just be sure to have a glass of milk handy to wash it all down. These are amazingly rich and delicious!


Chocolate Nutella Cupcakes:

Base:
You can use any chocolate cake recipe you like. I used the chocolate cake recipe from Chef in Training. You'll notice the recipe on the site is for Nutella cupcakes. I used the cake part, but switched up everything else. 

Most cupcakes bake at 350 degrees for 18-20 minutes. Let your cupcakes cool completely. Once cool, make a small hole in the center of each cupcake by removing some of the cake and fill with some nutella. 

Chocolate Hazelnut Buttercream:

1 stick butter, softened
1/2-3/4 cup chocolate hazelnut spread (start by adding 1/2 cup and increase if you would like more flavor)
1-2 TBS milk
1 tsp vanilla
4-5 cups powdered sugar
Chopped hazelnuts for garnishing (optional)

Beat Butter and hazelnut spread. Add 1 TBS milk and vanilla. Slowly add in the powdered sugar until you reach desired consistency. Add more milk if your frosting is too think, a tablespoon at a time. Pipe onto cooled cupcakes and top with chopped hazelnuts. 


Yummy!



Tuesday, March 25, 2014

Lime Rickey Cupcakes

 One of my most favorite drinks, especially in the summertime is Lime Rickeys. One of my other most favorite things is cupcakes thanks to the Talented Terrace Girl Teresa introducing me. I have really developed a love of cupcakes and baking them! I think my family and friends love my passion for baking cupcakes as well as they are my main test tasters! The best part of baking cupcakes is creating a recipe and having it turn out to be a great success! Well I have wanted to make a Lime Rickey cupcake because I absolutely love lime rickeys and figured hey that would make a good cupcake. Well the other day I did it! This cupcake tastes like a lime rickey. Yum is all I gotta say!


Lime Rickey Cupcakes
Base:

  • 1 white cake mix
  • 2 TBS oil
  • 1 cup sour cream
  • 1 cup flour
  • 1 cup sugar
  • 3 eggs
  • 1/2 cup water
  • zest and juice of 1-2 limes (I used 1 1/2 limes)
Mix all ingredients together, fill muffin tins with liners and fill liners 3/4 of the way full. Bake at 350 degrees for 18-22 minutes. Cool completely on a cooling rack.

Grape Buttercream:

  • 4 oz cream cheese, softened
  • 1 cup butter, softened
  • 1 tsp vanilla 
  • 1 small package grape jello
  • 5 cups powdered sugar-give or take
Beat butter and cream cheese together for about two minutes. Add vanilla and grape jello and mix until well combined. Add powdered sugar until you reach desired consistency. Pipe onto cupcakes. Garnish each cupcake with a slice of lime if desired and enjoy!

Makes 3 dozen cupcakes


Saturday, March 15, 2014

LDS Blog Train

Thanks for hopping over from our scrapbooking page.


Remember to go to our Facebook Page and grab the coordinating solids:


These were the papers from the Scrapbook Page if you got lost =)

Wednesday, March 5, 2014

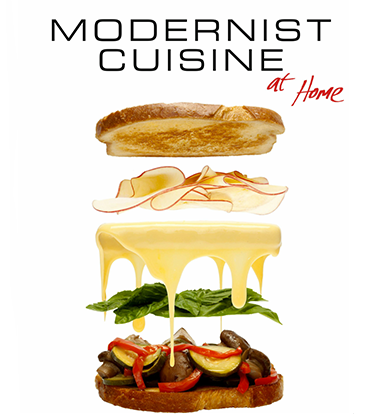
Wild Card Wednesday: Modernist Cuisine At Home

Hello readers! Amelia with Inkling shared some content of this book Modernist Cuisine at Home with us and we wanted to pass on the content to you our readers because some of these recipes sound really good! We are able to view the first chapter of this book absolutely free!  Click here to view the first chapter. 


Here's one of the recipes that I haven't tried yet, but definitely want to make here soon!

Lemon Posset

1 3/8 cups heavy cream
1/4 cup sugar
2.1 grams citric acid


Combine is a pot and dissolve sugar. Heat to 88 degreess C/ 190 degrees F. Remove from heat and add citric acid and stir. Mixture will turn into a soft custard. Cool for 10 minutes. Divide evenly amongst 6 small dishes. Pour lemon curd (recipe below) on top of each one. Cover with plastic wrap, and keep in fridge for 12 hours.

3/4 cup lemon curd (optional)

1/2 cup egg yolks blended
1 1/2 cups sugar
2/12 TBS lemon juice
1 3/4 cup unsalted butter
zest from one lemon
1/8 tsp salt

Preheat water bath to 149 degrees F. Place egg yolk in zip lock bag, removing as much air as possible. Bake for 35 minutes. Place immediately into an ice bath. Combine sugar and lemon juice in a pot over medium heat, stirring for about 2 minutes until sugar is completely dissolved. Cool to room temp. Pour cooked egg yolks into a blender and add lemon/sugar syrup gradually while blending. Continue blending and drop small cubes of butter into mixture until all the butter is incorporated. Stir in the zest and salt.

I copied this recipe right out of the book:)


Monday, March 3, 2014

Munchkin Monday: Chore Charts

So my kiddos are old enough to help pitching in with helping around the house and I wanted to try and make it as fun as possible for them. I also wanted to be able to teach them that part of living in a family is helping around the house and not expecting anything out of it, but I also want to teach them about earning and budgeting money at an early age. I browsed around pinterest and looked at a lot of different chore charts out there and decided to combine two that I really liked and created my own. I debated on whether to use pictures or write what the chores were, but decided to go with pictures to make it more fun and so my almost 3 year old can see and understand what each chore is. To incorporate earning money I made a bonus section where my children can choose if he/she wants to do that extra chore(s) and if they do, they can earn money as a result-.25 a extra chore. At the end of the month I will add up how much extra work they have done and then with the money I'm going to teach them to split that up and pay tithing, themselves, and what's left is spending money. My girl who is 5 seems really excited about this and I am hoping that they work as good as these look. We have only been using these for a few days now, but so far so good!


To make your own chart like this you will need:


  • 2 metal cookie sheets ( I got mine at the dollar store)
  • Spray paint (I used my kids' favorite colors)
  • paper tape
  • clear pebbles that can be found at any craft store
  • magnetic tape roll
  • an adhesive of some kind for the pebbles. I used some Zots that can be found in any scrapbooking section at a craft store
  • chores printable-you can browse the internet for some of these or make your own. I found some for free on http://homeschoolcreations.com
  • scrapbook paper 
I first printed my child's name and the tittles off my computer, placed them on some scrapbook paper, and cut them out all nice. Next I cut out the chores and adhered them to the pebbles using Zots. This is what they look like all done:


Next you will cut small sections of the magnetic tape and place it on all of the stuff. After that spray paint your cookie sheets. I made sure to apply a clear finishing spray after the paint had dried to "protect" the paint. Next put a strip of the paper tape down the center of the cookie sheet so you can make a column for the To Do's and Done's. Next apply some magnetic tape of the back of the cookie sheet(s) so you can place them on your fridge or any other magnetic surface. The final step is to put all your stuff on. You now can use your totally awesome and cute charts!!!