Showing posts with label Kayla. Show all posts

Friday, September 27, 2013

Halloween Luminaries


I am excited to put these out for Halloween. 


Here is what you will need:
-modge podge
-Acrylic paint (I used orange, green, and purple)
-black vinyl
-Halloween vinyl designs.  (I used my silhouette cameo to make some.)
-clear glass jars.  (I got mine at the dollar store. Make sure you can some what fit your hand in to paint it and put in tea lights)
-tea candles or battery ones(I got mine at the dollar store
-paint brush


1. Mix each paint color with modge podge
2. Paint each jar on the inside using the paint/modge podge mixture
3. When dry put the vinyl designs on the out side. 
4. Stick a tea light inside the jar.  Light it or turn on the switch.
5. enjoy!

Wednesday, September 25, 2013

Halloween Wreath


I don't know why but I really enjoy making decorations for my front door.  I decided to make a cute Halloween wreath.  I went to pinterest for inspiration.

All you need is:
-wreath (I used straw wreath, a foam one would work to)
-Halloween colored tull (I used purple and green)
-ribbon for bow
-Spiders, skulls, ghost or whatever other thing you want to glue on the wreath

I started by wraping the tull around the wreath.  Then I made a bow for the wreath,  Last I glued on the bow and spiders.  Side note I painted spots on the spiders. 


I love how my wreath turned out.  My husband liked it to.  We think its looks spooky. 

Tuesday, September 24, 2013

Sweet Tooth Tuesday: Caramel and Chocolate Dipped Apples


I must be in the mood for Fall already.  I am wanting to wear my cozy sweats and pajama's.  I want to curl up with a blanket and watch a movie or read a book.  I also want to make some great fall recipes for dinner.  Too bad the heat hasn't broken yet.  The best I could do for now was make dipped apples.  I found my recipe here.

Here is what you will need:
1 cup melted butter
1 cup light Karo syrup
2 cups packed brown sugar
1 14oz can of sweet condenced milk
1 tsp. Vanilla

9-12 apples (I used granny smith0
candy or popsicle sticks.  (I used kabob scewers)
melting chocolate.  (I used milk chocolate chips and it didn't harden without the fridge.  I would suggest the wilton melting chocoate.  You can get it at Michaels)
optional: spinkles, nuts or candies

1. Wash and dry the apples.  Be sure to remove the stick
2. Remove stem and put in the stick
3. Combine the melted butter, Karo syrup, brown sugar, and sweet condenced milk into a heavy sauce pan.  Bring it to a boil on medium high.
4. Once boiling bring to medium to medium low.  Stir Constantly
5.  Let the temperature reach 233 degrees or soft ball stage
5. Remove from heat and stir in vanilla
6.  Dip each apple in caramel and place on greesed peice of tin foil.  I placed my greesed tin foil on a baking sheet. 
7. Let cool completely. 
8. Melt your chocolate and dip apples in chocolate
9. Let cool a minute and sprinkle on nuts, sprinkles, or candies.


Friday, September 20, 2013

Foodie Friday: Zucchini, Black Bean, and Rice Skillet


Zucchinis Zucchinis Zucchinis everywhere and what to do and make with them all.  I have an easy recipe.  My boss gave me a huge zucchini.  I have now used it in two recipes and there is still some left over.

I made a Zucchini, Black Bean and Rice Skillet.  It was super easy.  Here is what you will need:

- 1 cup of rice (I used brown rice)
- 2 tablespoons of olive oil
-2 cups of cut up zucchini
- 4-6 Roma tomatoes
- 2-3 cloves of garlic
- 1 can of black beans
- 1 green pepper
- Shredded Cheddar Cheese
-Spices to taste( I used Italian season, Rosemary, black pepper and salt)

I stared out by cooking the rice.  While the rice was cooking I cut up the zucchini, tomatoes, and green pepper.  I then put the olive oil in a skillet pan and tossed the zucchini in.  I then used a garlic press to crush up the garlic and put in the skillet with the zucchini.  I then added the green pepper.  When the garlic, zucchini and green pepper were all cooked up.  I added the tomatoes and black bean.  I then added my spices.  Once the rice was cooked I added it to skillet.  Ta Da! I am all done with this super easy and delicious meal.  When I served it I topped it with some shredded cheddar cheese. 

Thursday, September 12, 2013

DIY Thursday: Bridal Shower Invites or Wedding Card

I am throwing my best friend a bridal shower and wanted to make her invites using my Silhouette Cameo.  I love my Silhouette Cameo.  For those that don't know what a Silhouette Cameo is it is a electronic cutting machine.  It can cut a variety of media including paper, cardstock, vinyl, heat transfer paper and so much more.  It is like the CriCut but better.  The thing I like the most about the Silhouette is there is no need to buy expensive cartriges.  The Silhouette has an online store where you can buy designs for 99 cents.  I have only bought designs I want and need for my projects.  The online store also features a free design each week. 

I went to craft store looking for white envelopes for my cards.  I ended up with something better.  I found white envelopes with pre fold 5x7 cards. (unfolded 10x7)  I then went on my computer and found a cute wedding card design.  I found a cute flower wedding dress.  I edited it to fit my 5x7 cards.  I then put my white 5x7 card on my mat and loaded it into my silhouette.  The silhouette did the rest.  After it was all cut out I folded the card.  I then glued a colored 4.5x6.5 inch cardstock to the inside of the card.  I then typed up the wording for the invite in microsoft word and formatted it to be a bit smalled than the colored 4.5x6.5 cardstock.  I cut out the wording and glued it onto colored cardstock.  Super easy and cute homemade invite.


The best thing about purchasing designs on the Silhouette is the image is yours.  I can now use it on other projects.  This design could be also used to make a homemade wedding card. 

Wednesday, August 21, 2013

Wild Card Wednesday: Summer Door Decoration

I have been MIA on here.  It has been one busy summer.  Sorry ladies.  I will do better I promise. I finally finished a project I have wanted to do all summer.  It was a simple door decoration.  All I did was buy a wood letter S (S for summer and Sherman) from the craft store.  Painted it white.  Let it dry.  Then I applied crackle paint (Which I found next to all the acrylic paints in the craft store.)  Followed the directions for the crackle paint.  Then I painted the teal over the crackle. Finally I added flowers and ribbon and hung it on my door.  I am pleased on how it turned out.  I wish I had done it earlier this summer because I will be taking it down soon to put up my fall wreath. 

Tuesday, July 2, 2013

Sweet Tooth Tuesday: Applebees Blondie


I love the Maple Butter Pecan Blondie at Applebees.  It is always a perfect way to top off after a great meal there.  I especially love the sauce.  I have been craving it since the last time I was there and had it.  I decided to search and see if I can find a copycat recipe. 
Here is what you will need:

Brownie

Maple butter sauce

  • 1 1/3 cups sugar
  • 1 cup whipping cream
  • 2/3 cup butter
  • 2 teaspoons maple flavoring
Brownies Directions:
1. Mix brown sugar and butter
2. add baking powder, salt, vanilla, and eggs
3. add flour
4. fold in white chips and nuts
5. Greese 9x13 pan and spread brownie batter into the pan.
6. Pre heat oven to 350 degrees and bake for 22-25 minutes
 
Sauce Directions:
1. Bring sugar, whipping cream, and butter to boil.  Let boil for 2-3 minutes
2. Take off heat and add maple flavoring
 
Presentation:
Cut brownies into 12 pieces.  Put one piece on a plate.  Top with ice cream.  Pour sauce on top. 
 
Warning: Very rich!


Tuesday, June 18, 2013

Sweet Tooth Tuesday: Cream Cheese Chocolate Chip Cookies


I wanted to make all three of my moms cookies for mothers day along with their presents.  Yes I have three mom's and I feel lucky.  I have my mom of course and two awesome mother in laws.  I also wanted to make a recipe I hadn't tried before.  I wanted something that I could use my vanilla that I got in mexico.  Yum! These cookies turned out great.  They were so soft and gooey.

Here is the website I got the recipe from. 

Ingredients
  • 2 & 1/2 cups all-purpose flour
  • 1 teaspoon baking powder
  • 1/2 teaspoon salt
  • 1/2 cup unsalted butter, softened
  • 8 ounces cream cheese, softened
  • 1 cup granulated sugar
  • 1 cup packed light brown sugar
  • 2 large eggs
  • 1 & 1/2 teaspoons vanilla extract
  • 1 & 1/2 cups semisweet chocolate chips
Instructions
Preheat oven to 350°. Grease or line baking pans.
Whisk together flour, baking powder, and salt. Set aside.
Beat butter, cream cheese, sugar, and brown sugar until fluffy. Add eggs, 1 at a time, mixing well after each addition. Mix in vanilla.
Gradually add flour mixture, mixing until almost combined. Add chocolate chips, stirring until dough is thoroughly mixed.
Drop dough by tablespoonfuls onto prepared pans. Bake 12-15 minutes, or until edges are lightly browned. (These cookies will not brown like classic chocolate chip cookies.)
Cool cookies completely on pan on wire racks

Thursday, June 13, 2013

DIY Thursday: Fourth of July Wreath


I made this wreath last year.  It was my first wreath I ever made.  It was really easy and fun to make.  I love the combination of our nations colors.  All you need a foam wreath, white, blue, and red yarn, and white buttons.

Wrap blue around the wreath, then wrap white and red around the wreath.  Then glue the white buttons on. 

Wednesday, March 27, 2013

Wild Card Wednesday: 500 Miles of Summer

I love all 4 seasons, but Summer is my favorite by far.  I love being out in the sun.  My favorite thing about Summer is bike rides.  It is something my husband and I enjoy doing together.  We have talked about family bike rides one day when we have kids.  I am excited for the day we can go on family ones.  I hope our kids love to bike as much as we do.  With thats being said I ran across this idea from Pinterest.  It was a poster with a chart and it said 100 miles of summer.  Their family goal was to do 100 miles through the course of the summer.  I turned to my husband and said we should do this one day with our kids.  He replied by saying we should do it now but do 1000 miles.  I thought 1000 was quite a bit, especially because we always seem to get busy in the summer.  So we decided on doing 500. 

I used my new Silhouette Cameo to make a fun poster with two charts.  We are going to use stickers to mark and keep track of each mile.  My husband laughed at me when I told him about the stickers.  He said a pencil works just fine too.  I think he decided it was cute my inner child was coming out. 


You can find this awesome post linked up to the following Fantastic Parties:


Friday, March 22, 2013

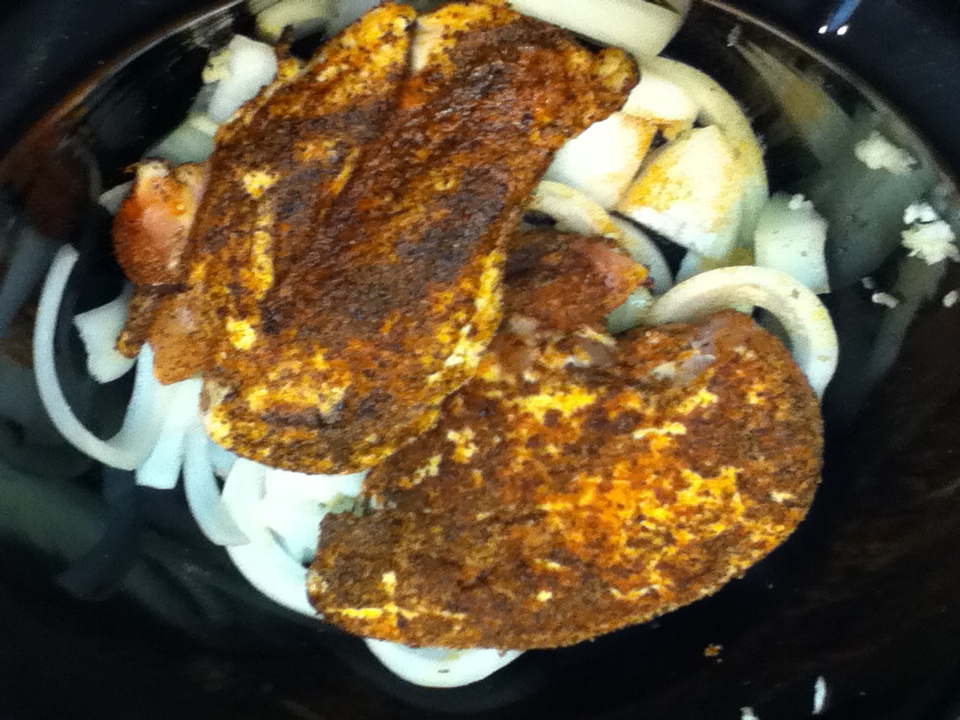
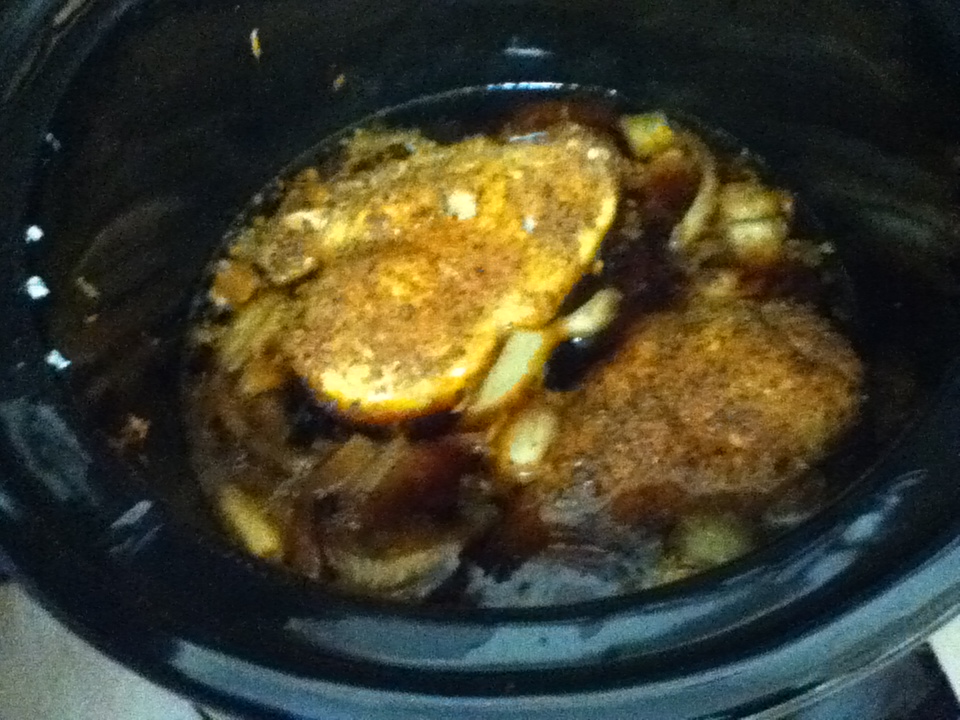
Foodie Friday: Slow Cooked Chicken Adobo

I love doing crock-pot meals.  They are easy, less of a mess, and dinner is done when you get home.  I love that feeling.  I have been in rut with crock-pot meals.  I just go to my default chicken breast, with carrots, potatoes, and cream of chicken soup. So I went on a search for a crock-pot meal that both my husband and I would enjoy.  I found this recipe on http://www.crock-pot.com/ and changed it up a bit. Chicken Adobo is a Filipino dish.

1 Chicken breast for each person
peeled garlic cloves from the head of one garlic bulb
1 large (or 2 small) sliced sweet or yellow onion
3.5 oz low sodium soy sauce or low sodium tamari

4 oz apple cider vinegar
1 inch knob of fresh ginger, cut into thick slices( I just used ground ginger)
6 bay leaves (or less)(I didn't have whole bay leaves, so I used crumpled up ones)
freshly ground black pepper
garlic powder
paprika (optional)
1 tablespoon + 1 tsp of heart healthy cooking oil (I used Olive Oil)


1.  Season both sides of the chicken breasts with paprika, garlic powder, and ground black pepper.

2. Grill the chicken so it browned.

3. Cut up onions into slices.
4. Put oil in the bottom of the crock-pot and line the onions at the bottom.

5. Sprinkle bay leaves on top of the onions
6. Put garlic in the crock pot.  You can either just put a few peeled cloves in mince up the cloves and put them in.  I used my garlic press. 
7.  Set the browned chicken in.


8. Pour the soy sauce and apple cider vinegar in the crock-pot
9. Turn on crock-pot and set to low for 8 hours. 


I am going to serve this with steamed green beans.  You could also serve it with rice.  Or Both :)


My husband wanted me to talk about these.  He thinks they are like doggy poop bags.  I really like these ziplock perfect portions for many reasons.  I can take chicken breasts and freeze them without the breasts sticking together.  Then when I need chicken I just pull out how much I need.  I am sure you have seen the commercials for them. 

You can find this awesome post linked up to the following Fantastic Parties:


Wednesday, March 13, 2013

Wild Card Wednesday: Spring Wreath


Spring is almost here.  I am eager to get outside and not be cooped up.  I thought I would invite spring by making a spring wreath.  I am ready to take down my winter one.  This wreath was easy and enjoyable to craft. 
Here is what you will need:
-Different colored fabric.  (I found precut and matching fabric bundle at Joann’s with five different colors)  I would say ¼ a yard of each. (If that)
-yarn (coordinating color with your fabric)
-jewels or buttons (for the center of the flowers
-ribbon
-1/4 yard of felt (I found some in the clearance section for &.38.  That’s a steal.)
-foam wreath
-fabric scissors
-cup, mug or anything circular ( a circle that is the size that you want your flowers to be

1.       Wrap the yarn around the wreath.  When finished tie a knot between the beginning and the end.  Then hot glue to wreath so it won’t unravel. 

2.       Trace circles onto fabric.  Cut out circles.  You will need 8 circles per flower

 
3.       Trace circles onto felt about the half the size of your fabric circles.  You will need one felt circle per flower. Cut out felt circles
4.       Take one circle and fold in half and then half again.

 
5.       Snip off a little of the point of the folded circle
6.       Do steps 4 and 5 to four of the circles.  These will be the bottom layer of your flower.

7.       Glue the four folded circles to the felt circle.  The center will make a square.

 
8.       Repeat steps 4 and 5 for the top layer of the flower
9.       Glue the other  four circles onto the top of the other folded circles
10.   Take a jewel or button and glue to the center of the flower

 
11.   Repeat step 4 through 10 to make other flowers.

 
12.   Glue the flowers to the wreath.

 
13.    Tie ribbon to wreath and hang up on the door. 

You can find this awesome post linked up to the following Fantastic Parties: