Sunday, July 31, 2011

Easy Pasta Bake

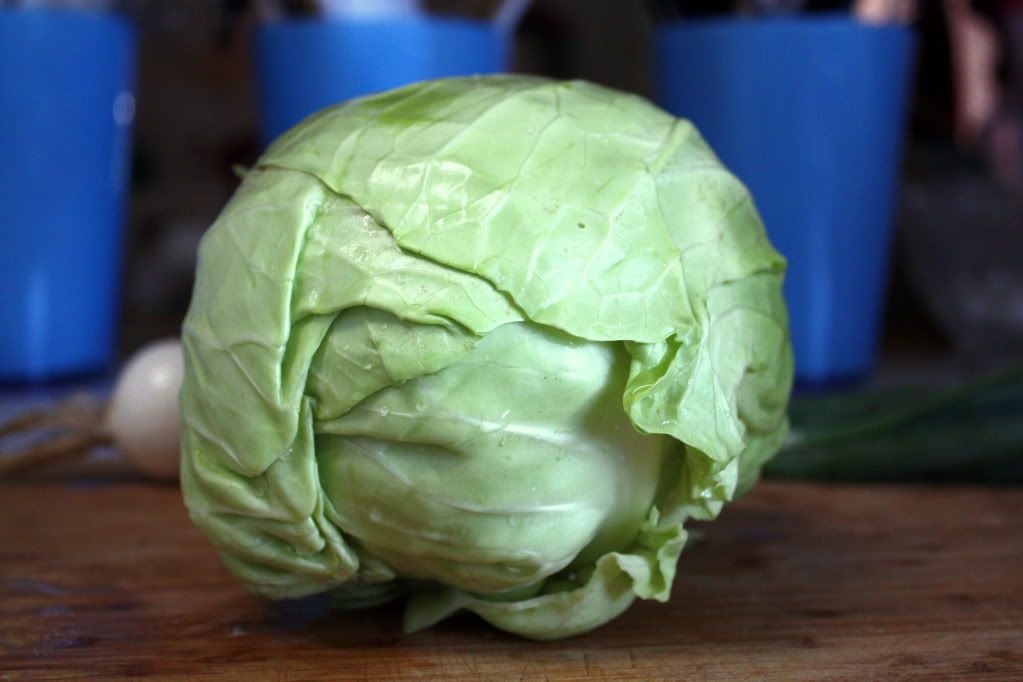
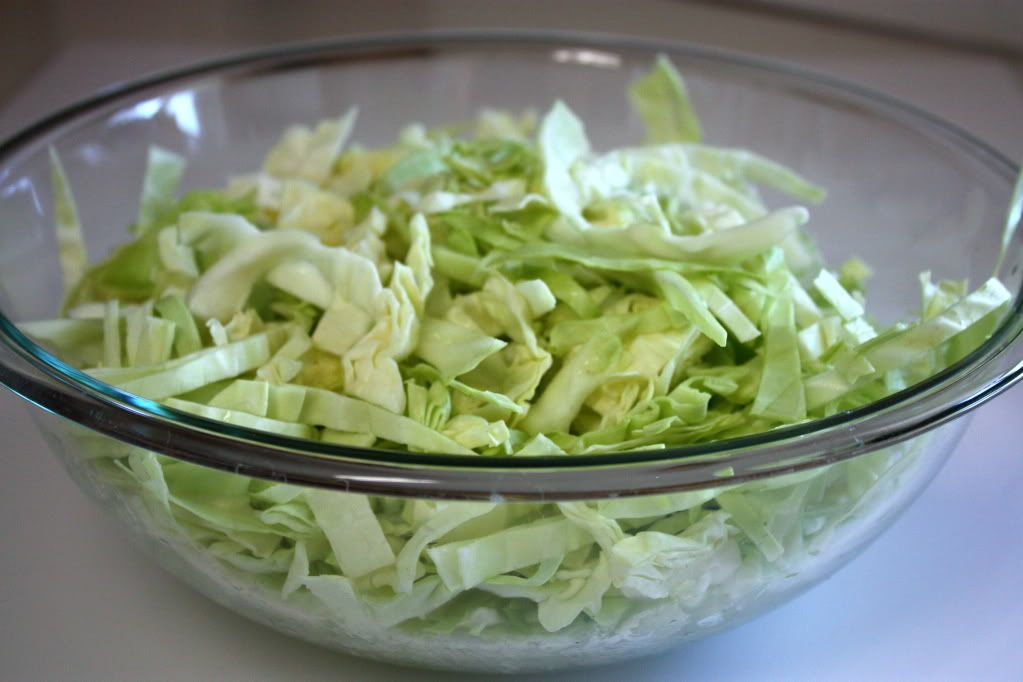
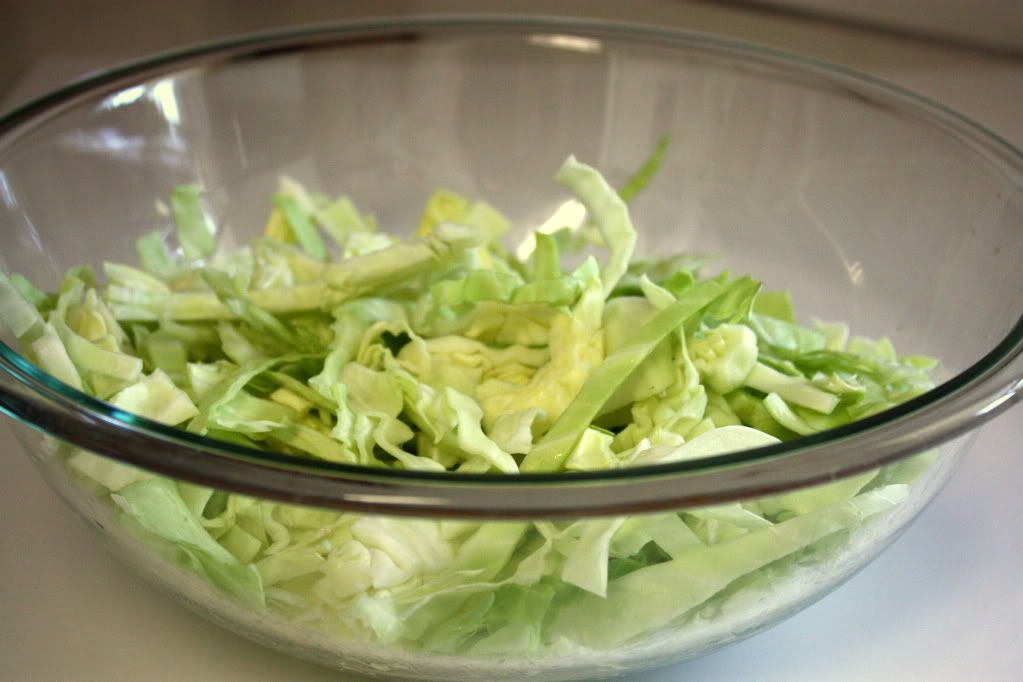
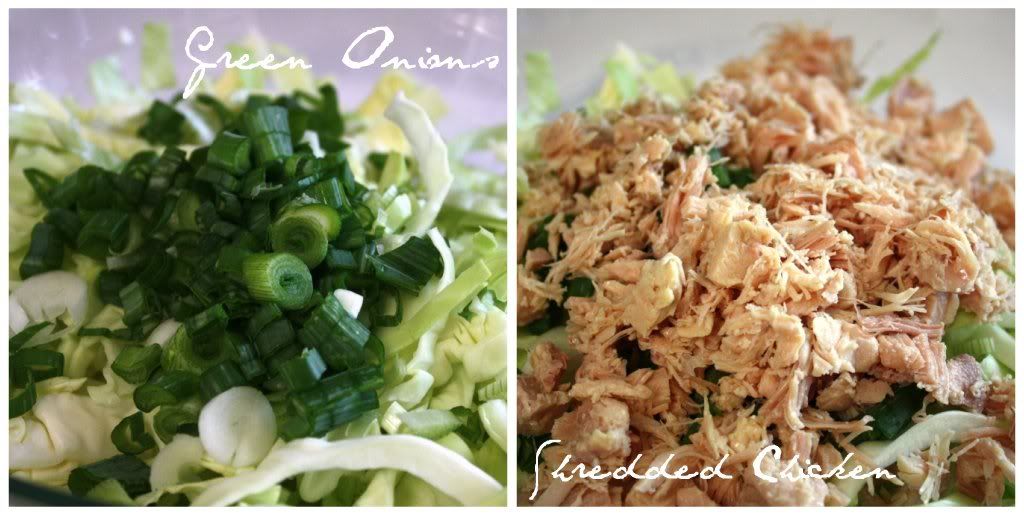
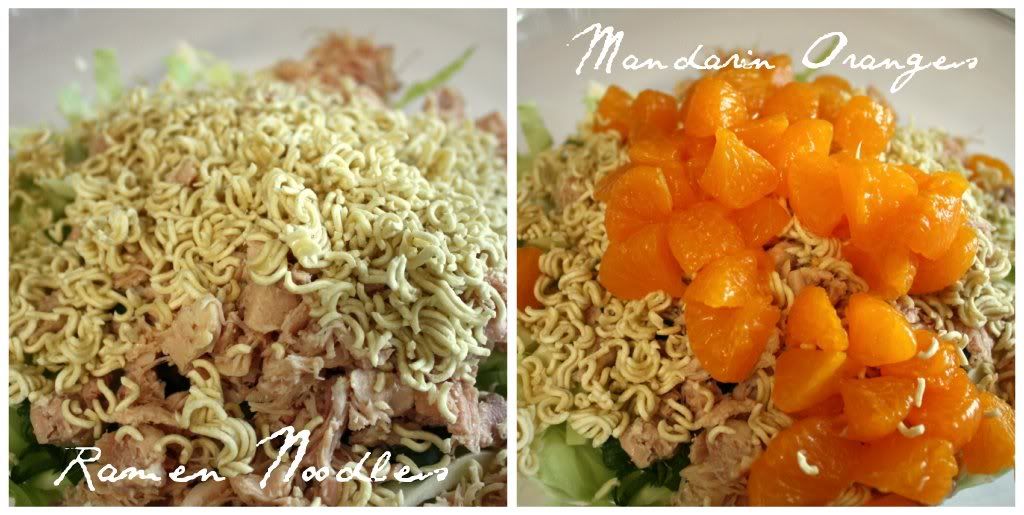
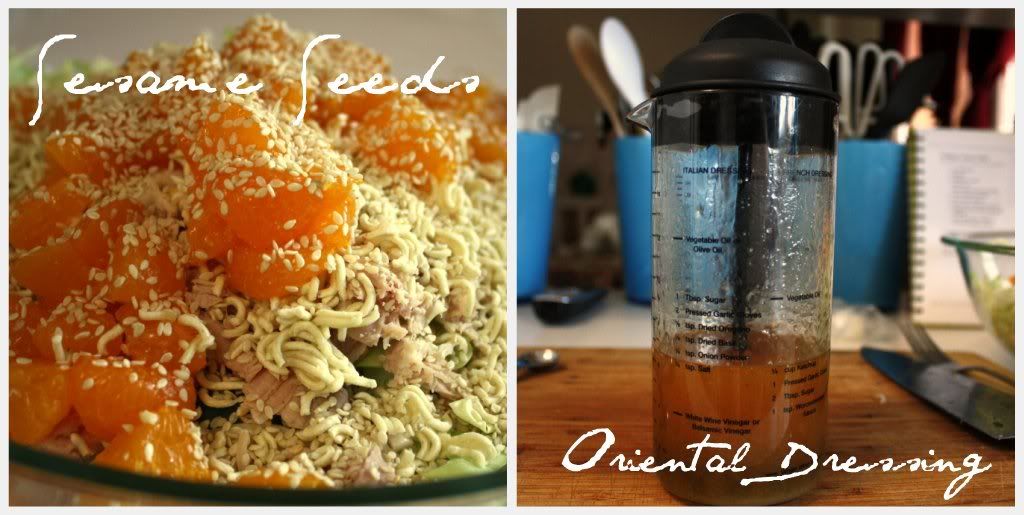
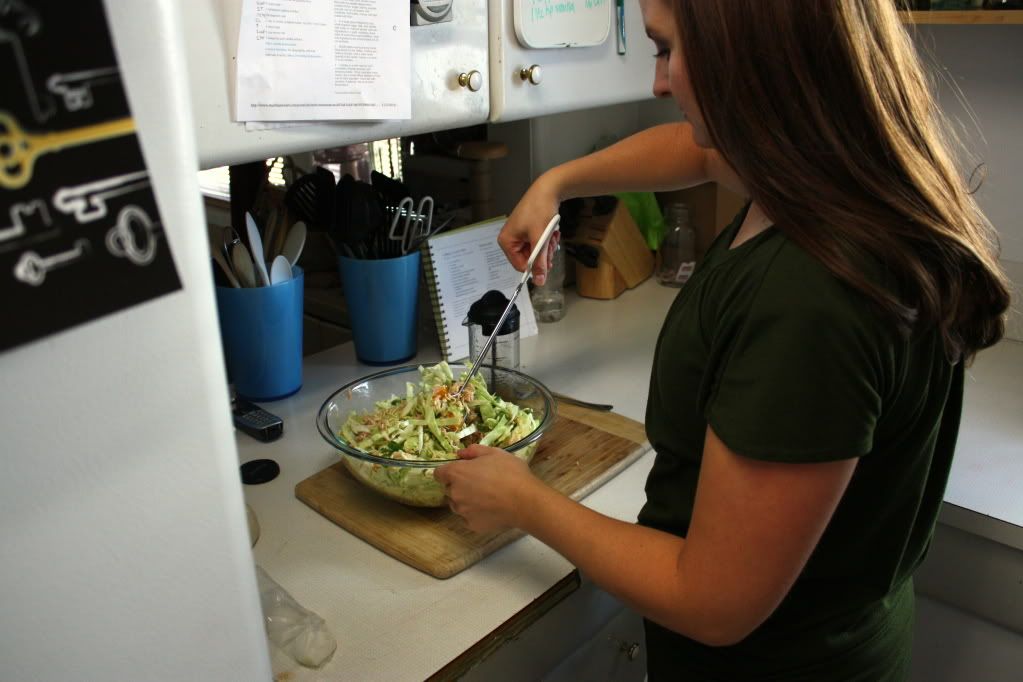
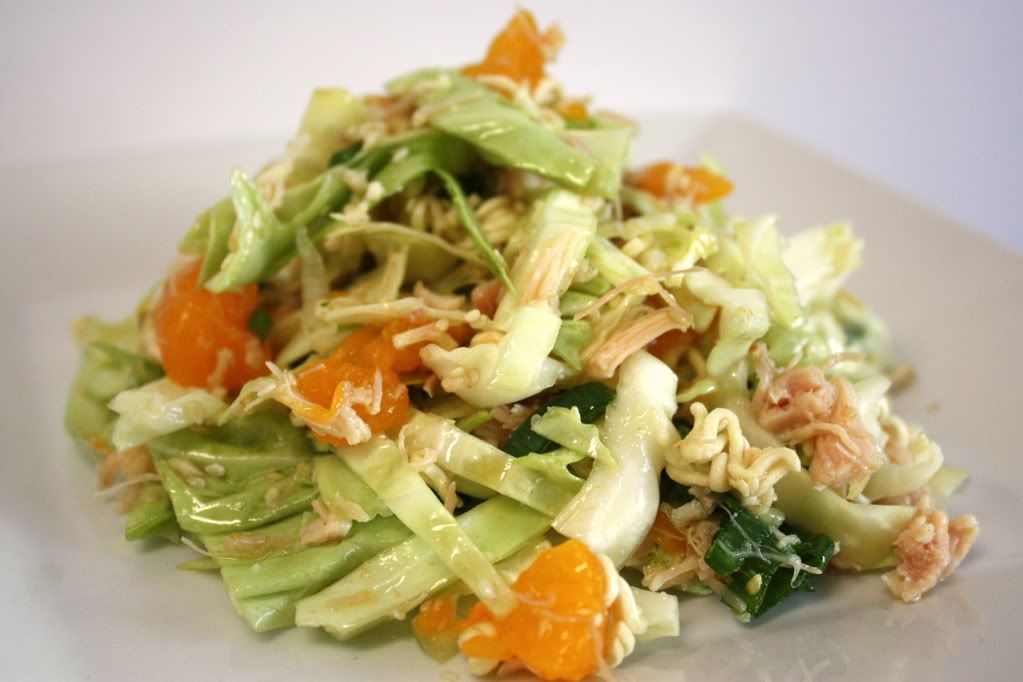
So I've been meaning to put this recipe on for some time now and I figure if I don't do it now then I probably won't get around to putting it on. This is super easy and really yummy!

Easy Pasta Bake:
1lb ground beef
1 30 oz jar spaghetti sauce
1/2 cup grated parmesan cheese
5 cups cooked pasta or macaroni
2 cups (8oz) shredded mozzarella cheese

Brown ground beef, drain. Stir in spaghetti sauce and parmesan cheese. Add cooked pasta or macaroni. Spoon into a 9x13 baking dish. Top with shredded mozzarella cheese. Bake at 375 for 20 mintues.


Whole Wheat Pumpkin Chocolate Chip Cookies

 I know these are out of season, but I still love them!!!  Most people only like to eat them around Halloween and Thanksgiving, but I love these anytime of the year.  Also, most people cheat and use the spiced cake mix to make them.  Lame!!  It's so much more fun to make them from scratch.  Everyone in my house loves these, except my hubby, but that's because his mom used to make them all the time when he was younger and now he doesn't like them.  Oh well....more for me =)  Plus, since I used wheat in these he won't come near them....he's won't go near anything healthy. I love him anyway =)


1/4 c. shortening
1/4 c. butter
1/2 c. white sugar
1/2 c. brown sugar
1 egg
1 tsp. vanilla
1 c. pumpkin puree
2 c. whole wheat flour
3/4 tsp. baking soda
3/4 tsp baking powder
1/2 tsp salt
3 tsp. cinnamon
1/4 tsp nutmeg
dash cloves
1/4 tsp pumpkin pie spice
1 c. chocolate chips (or more if you want =)  )

Preheat oven to 375.  Cream shortening, butter and sugars.  Add in egg and vanilla.  Mix in pumpkin, spices and chocolate chips.  In separate bowl combine flour, soda, baking powder and salt.  Add to wet mixture.   Drop the dough by tablespoons onto a greased cookie sheet.  Bake for 10-11 minutes. 

These cookies don't spread a whole lot so feel free to plop them close together.  These cookies won't have a crunchy texture, but will be soft and cake-like.  They stay nice and moist too.  =)   Feel free to add more spices to the batter too, that way you have a good excuse to eat the dough....you're "testing" it.  I know I had to "test" my dough several times and then had to "test" a cookie (or 2) from each batch out of the oven to make sure they were good enough for everyone else.


Wednesday, July 27, 2011

Cupcakes!!!!!

DO NOT EAT!!!!!!!!!

I know this is JeNae but she is an awesome model!

Can I just say I LOVE CUPCAKES!! I tend to get obsessive about things and to try different styles and designs with most things i like. I also like jewelry (basic stuff) and i enjoy playing with Sculpty clay. 

Things you need--Scultpy Clay in varying colors (if you are like me you will have a shoe box full that has been sitting around for years waiting for the crafter to get crafting) 
If you have some seed beads they are fun to add to the creations
Also some eye hole screws that you buy from the harware section of a department store (for 1 style)

Making a Flat Necklace Cupcake
Step 1-pick the color you want for base and roll it into a ball. then flatten it to about a 1/4 inch thick. Flatten where the frosting will go and the bottom. then make the sides flat but remember to taper the sides into the bottom if you make them straight the look a little boxy. 


 Step2- using a knife or special tool that you got when you were 16 and by chance still have in your scultpy box! you need to make the paper lines down the sides i was just doing the front and sides but decided if i do it all the way around some will just not have a back side which is even cooler. Remember you are not supposed to let sculpty touch anything you use food with so make sure you line your pan with parchment and you dont use any kitchen tools.


Step 3- Pick your frosting color and roll it into a snake. then spiral around the top of the cupcake to make your frosting like you piped it on or make a half circle to make the frosted with a knife look.


Step 4- I normal add the hole into the side now and then add the toppings so that i don't squish the toppings. I always seem to put the hole in the frosting right above the base (into the first layer of spiral) it seems to be up a little more than half so when you wear them they don't go topsy turvy. 


Step 5- Last place them on a pan and bake at 275 for 10-15 minutes


Now i made 2 different designs and found the circular (true cupcake shape) with an eye hole screw are super cute and would be awesome key chains, but if you don't screw the eye hole screw in "just" right they will be lose so then it will move and it might unscrew out of your cupcake. Meaning you have to screw them in perfect or use some glue if they come unscrewed. The flat design is my FAVORITE!! They make awesome necklaces and are super fun and easy to make. 

                                          
7 yr old idea! Blue sky base cloud with a rainbow across the sky.

Here are some fun styles and ideas that i have made in the last few days. I am learning that telling my 7 yr old to draw some cupcakes she wants me to make gets some GREAT color combos and ideas rolling so look to your little ones if you are feeling like you are in a rut. If i can make her dream one it is a rainbow base with  butterfly frosting on top!! Ya she is creative and super cute. 

Click on the picture to see them BIG!


This is one my 7 yr old made ALL by herself she was soooooo excited to actually get to do it without my help


Tuesday, July 26, 2011

Chocolate Raspberry Cupcakes

Preheat oven to 350. Line 2 cupcake pans with liners.


Ingredients:
2 1/4 c. flour
1/2 c. cocoa
1 1/2 t. baking soda
1/4 t. salt
1/2 c. shortening
1 3/4 c. sugar
1 t. vanilla
1/2 t. raspberry extract
3 eggs (room temp.)
1 1/3 c. cold water


Stir together flour, soda, salt and cocoa powder and set aside. Cream together shortening and sugar until well combined. Add the vanilla, and then the raspberry extract until combined. Add the eggs, one at a time until well blended. (If you've just taken the eggs out of the fridge, place them in a cup of warm water for about five minutes to warm them up!) Add the flour mixture and water until all mixed.

Fill cupcake liners 3/4 c. full. Bake for about 25 minutes, or until a toothpick inserted in the center comes out clean. Cool, then frost.

Frosting

8 oz. cream cheese

6 T. butter

3 1/2 c. Powdered Sugar

1 t. Vanilla

*Beat these until combined.

In a large frosting bag, place a few dollops of raspberry preserves in one side. Fill the other side with the cream cheese frosting. Using a star tip, pipe the frosting onto the cupcakes. Garnish with fresh raspberries.

Monday, July 25, 2011

Melting puddy

MESSY, MESSY, MESSY BUT SO MUCH FUN!
What you will need:
Bowls
corn starch
water
food coloring
You will need about 1 tablespoon of water to 2-3 tablespoons of cornstarch. The trick to this is to experiment with it, if it is not hardening enough that you can pick it up then add more corn starch. If it is to hard that it is not melting in your hand then add just a little water. when you get it right the fun is endless and the messy is GREAT!

You can even try to swirl two different colors to make a new color. MAGIC!

Sunday, July 24, 2011

Patriotic Strawberries

I came across this perfectly scrumptious patriotic snack recently from Family Fun. So easy, so cute (because that is so important! Ha!) and super yummy.

Revolutionary Berries
Ingredients:
  • 12 ounces white chocolate chips
  • strawberries
  • blue sugar or edible glitter (You can easily make your own blue sugar using granulated sugar and food coloring)

Instructions
1. Melt the white chocolate chips in a microwave according to the package directions (make sure the container and berries are dry; even a little moisture will alter the texture of the candy)
2. One at a time, dip strawberries into the chocolate and then into the blue sugar or edible glitter.
3. Set them to harden on waxed paper

Saturday, July 23, 2011

Orange Creamsicle Cupcakes

I like to bake. I might have an addiction. But i also have a problem with things not tasting REAL!!! I can't have chocolate in my Rootbeer Floats (hehe trinity), or things not being balanced proportionally like I think they should be. It is of course how I THINK it should all taste. Cause well... I am the one cooking!!! :)
When i had a friends husband request Orange Creamsicle i thought to myself what does that include. I decided Vanilla and Orange and nothing else. I pulled wikipedias definition so you can see i am not totally crazy :)
Wikipedia says this-Creamsicle-The center is vanilla ice cream, covered by a layer of flavored ice. Creamsicle flavors include orange, blue raspberry,  lime, grape and cherry. Oh i didn't know Creamsicles had so many flavors this could be FUN!!
My test baking always includes going to the internet seeing what other people have tried. Normally i pick 1 recipe that seems the closest to what i would like and try it...and it seems whenever i do that maybe something will be okay, some are not good, so then i have to create myself and get to work! 
Okay these cupcakes have a vanilla base and a knock your socks of orange frosting! The orange has to be intense cause that is the main taste in a creamsicle but the vanilla has its own independent flavor as well that is why i couldn't have an orange base and orange frosting. Yes i know the orange is intense and you will LOVE it!!! 
ALso when i have pictures of my cupcakes they dont have intense colors, because my little man is allergic to red dye 40 and so we have reduced most dyes from our baking and homemade things now. If you want to add the dye then please do and send me a pretty picture! 

Vanilla Cupcake Base
1 dry vanilla cake mix                                       
1 C. flour                                                          
1 C. sugar (if you have vanilla sugar use it)         
¾ tsp salt                                                          
1 1/3 C. water                        
1 C. sour cream or plain yogurt          
2 Tbsp vegetable oil
2 tsp vanilla (or vanilla paste so you get the pretty vanilla flakes)
3 eggs


Mix all the wet ingredients. Mix all dry separate then add to wet mix. Scoop into cupcake papers and bake 350° for 18-25 min (time depends on your stove and cupcake pan) 


Orange Creamsicle Frosting
1 lb (4 cubes) butter, softened
½ container (3/4 C.)of orange juice concentrate (don't make into juice) 
2 tsp orange extract
6 C. powdered sugar
1 oranges zest
Cream the butter well then add the orange juice concentrate, and extract. Add the powdered sugar slowly to the consistency you want. You could cream the butter then add the powdered sugar, extract and then add juice to right consistency.  Zest can be mixed in or sprinkled on top. Put in piping bag and pipe to your hearts content! 


I linked to

http://www.craftyconfessions.com/2011/07/cupcake-palooza-2011.html

Friday, July 22, 2011

Oriental Chicken Salad

Cabbage....
I've got some growing in my garden. They're all grown up and ready to be picked. This salad was one of things that I wanted to use with the cabbage; I also have plans to make cabbage rolls, coleslaw, and who knows what else.
Oriental Chicken Salad
The Star of the show.....and I can't tell you what kind of cabbage we planted. All I told my hubby is that I wanted to grow cabbage in the garden this year.
Chop up the cabbage. This is the whole head chopped up...it filled up the entire bowl, and I picked one of my bigger bowls.
So I took out half the cabbage to save for another use.
I then added the rest of the ingredients:
And mixed it up. I figured if I had my tripod out, I might as well take some pictures of me doing things :)
And here is the finished product!
Very delicious. Very Fresh. My oldest scarfed it down. He was trying to beat me :)
Enjoy!


Shaving Cream Project

This is a fun way for kids to make their own colorful paper to make a card for grandparents
What you will need:
Cookie sheet
shaving cream
food coloring
tooth picks
knife
construction paper
Take the cookie sheet and squrt shaving cream all over it, spread it all over with the knife. Add drops of food coloring
Take the tooth picks and swirl the colors together to make a cool fun design
Place your construction paper on top, pat down lightly then lift it off. take the knife and lightly scrape the shaving cream off the paper
Now you have some fun colorful paper to make whatever your heart desires

Thursday, July 21, 2011

Pink Lemonade Cupcakes

 What is more refreshing on a warm summer's day than a tall glass of cold lemonade?  Not much, but these come close.  I was blog hopping one day and came across these oh-so-yummy cupcakes.  I found the original at That's so Michelle.   I have been trying to stay away from chocolate lately (step 1 in getting away from too many sweets, next step will be the other stuff =)  )I still have to have my desserts though so I wanted something with no chocolate but something that could satisfy my sweet tooth.  Boy oh Boy!  These sure did!  They are nice and sweet with a bit of tartness.  Plus, they are super easy!!!!  Not much more to them than regular cupcakes.  I was excited that my frosting actually stayed in place.  For some reason, I can never get frosting to thicken up the way I want it to.  I don't like it to taste like powdered sugar so I try to minimize it, but it's tough trying to find things to add in that add structure and flavor....so if anyone has any suggestions or good frostings without a ton of powdered sugar, hook me up!  Anyway....you should whip up batch of these!  These would be perfect for a baby shower too =)


Cupcakes
1 box white cake mix
3/4 cup frozen pink lemonade concentrate
1/2 cup water
1/3 cup vegetable oil
2 eggs
3 drops of red or pink food coloring(optional)


Frosting
2-3 cups confectioners sugar
1/2 c butter (room temperature
1/4 c. shortening
3 tbsp frozen pink lemonade concentrate
Pinch of salt


Preheat oven to 350 degrees and line your cupcake pan with liners. Combine all of the ingredients and mix with an electric mixer until smooth. Divide the batter evenly, filling the liners about 2/3 full. Bake for 18-20 minutes. Let cupcakes cool completely before frosting.
Combine all frosting ingredients in an electric mixer on a low speed until combined.  Whip on medium-high until light and fluffy.  Spread on cupcakes and enjoy!!